A wig that is worn properly and well-styled can give you a “snatched” confident look. For instance, take a look at celebrities like Kylie Jenner and reality TV stars like Brooke Valentine whose wig games are top-notch, giving them a polished luxury appearance. Guess what? You too can have a good slay just like them.
However, you must know that such a near-perfect look takes a lot of effort. Now, it is understandable that as a beginner, you may feel a bit nervous about this. But don’t worry because, in this article, you will be learning the correct steps on how to put on a wig.
Beginner-friendly Guide On How To Put On A Wig
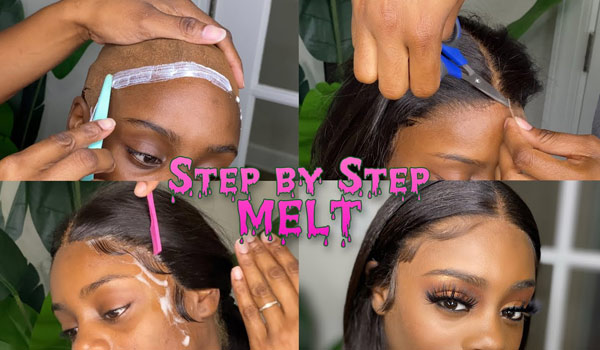
YouTuber, Tee the Slayer, shares a detailed video showing how to install a frontal wig:
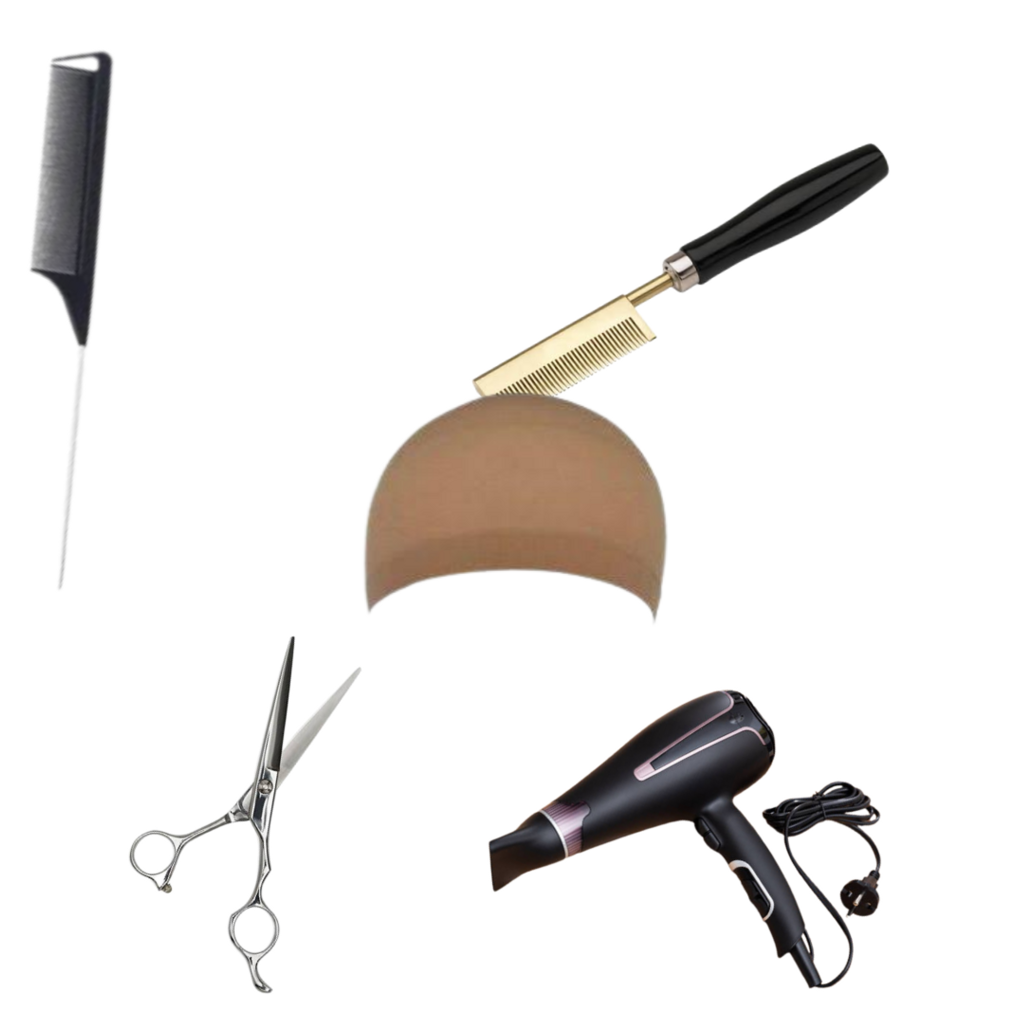
To do this, you will need:
- Wig cap
- Wig glue
- Rattail comb
- Blowdryer
- Setting powder or powder foundation
- Powder brush
- Hair scissors
- Makeup remover
- Cottonwool
- Elastic band
- Holding spray
- Hair wax
- Pressing comb
- Edge control
- Edge brush
- Your wig
1. Secure The Wig Cap On Your Head
(Before doing this, make sure you put your hair in cornrows. This will help the wig lay flat on your hair and prevent any bulges)
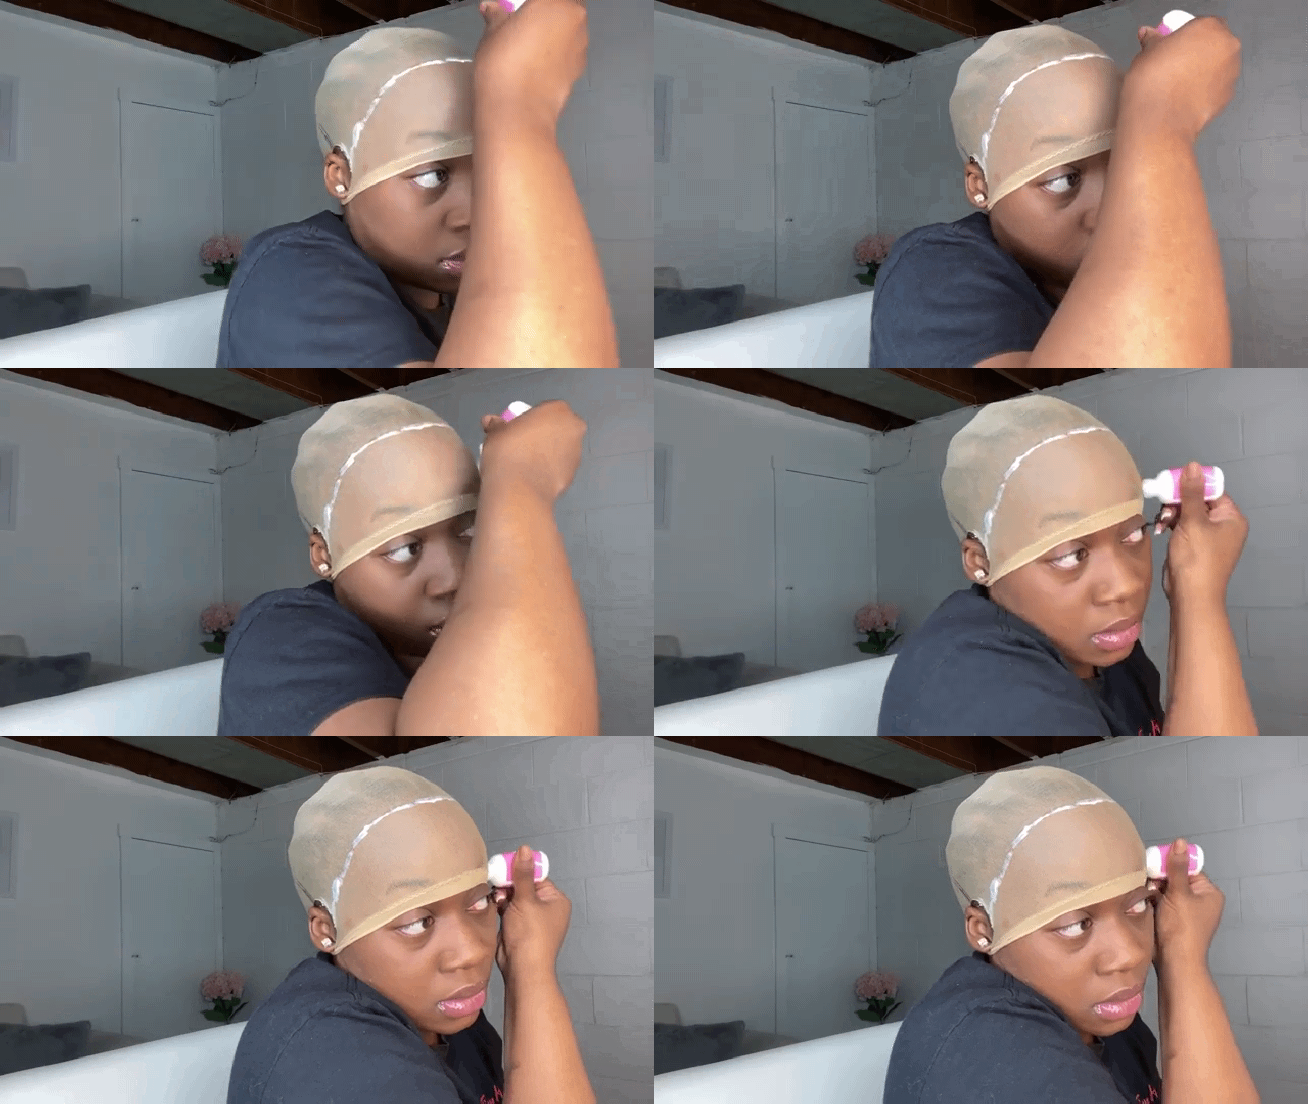
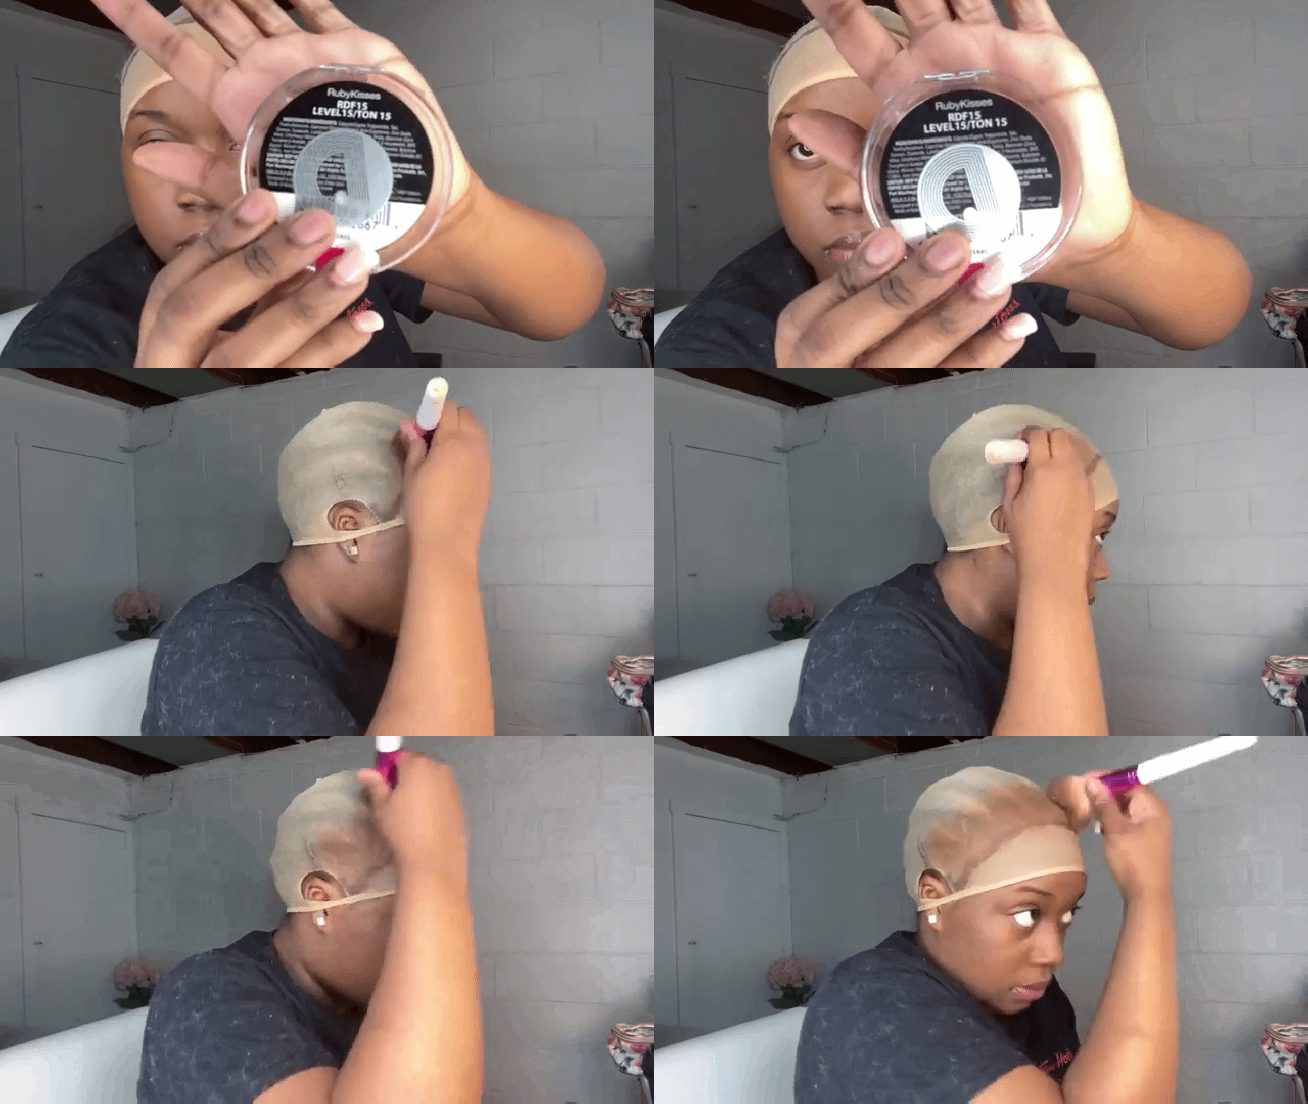
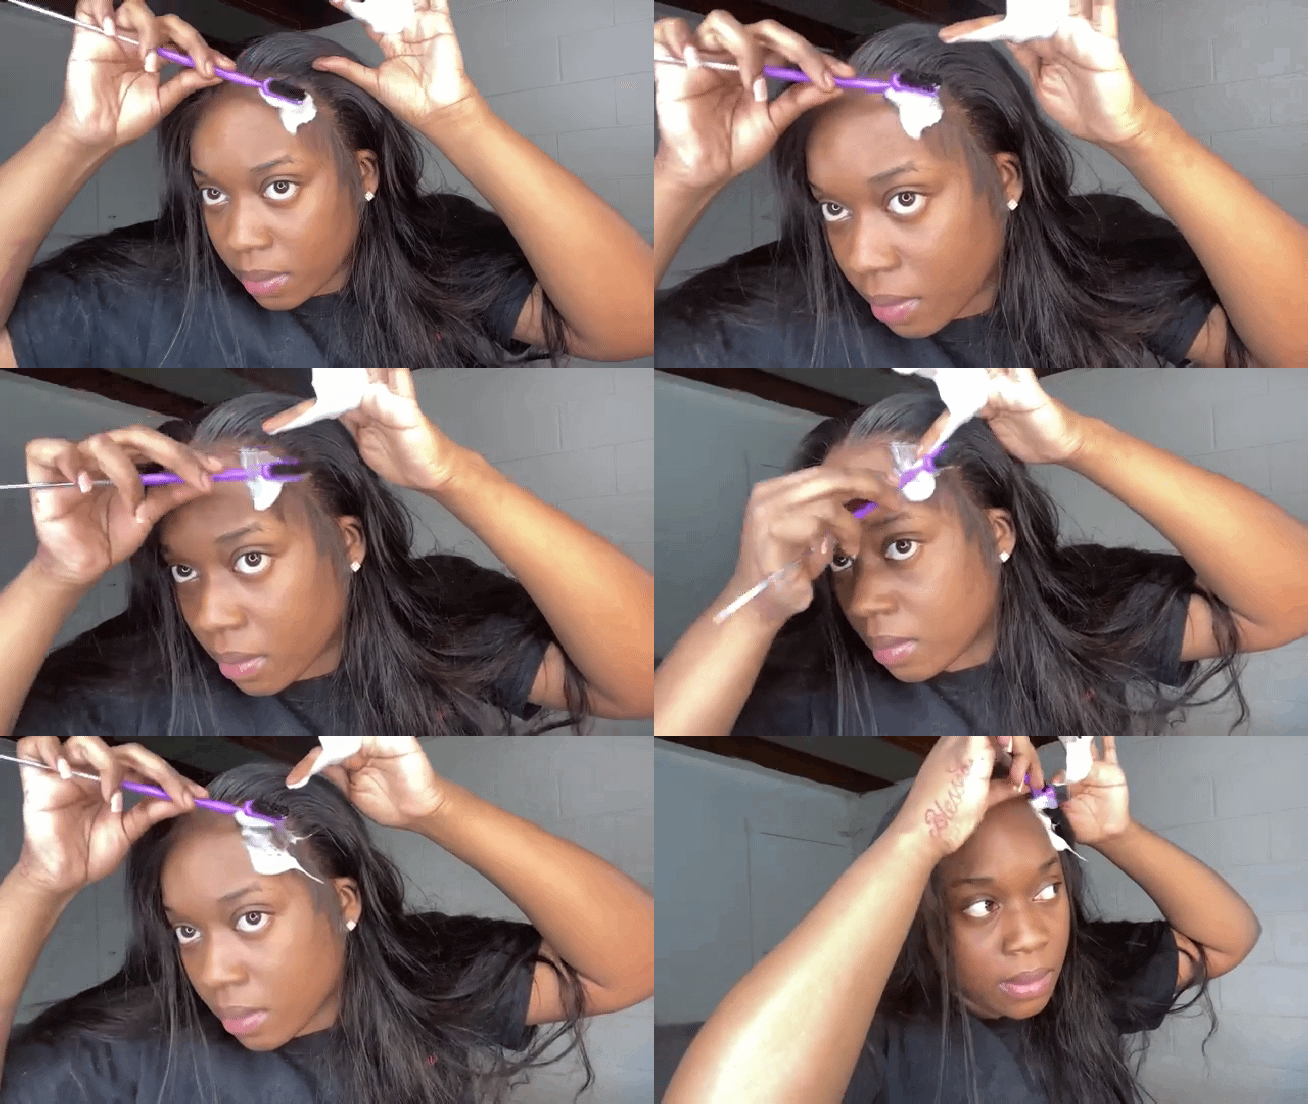
- The right wig cap should stretch out close to your eyebrows but remain firm on your head. Apply a thin film of wig glue on your cap from ear to ear over the front hairline of your head.
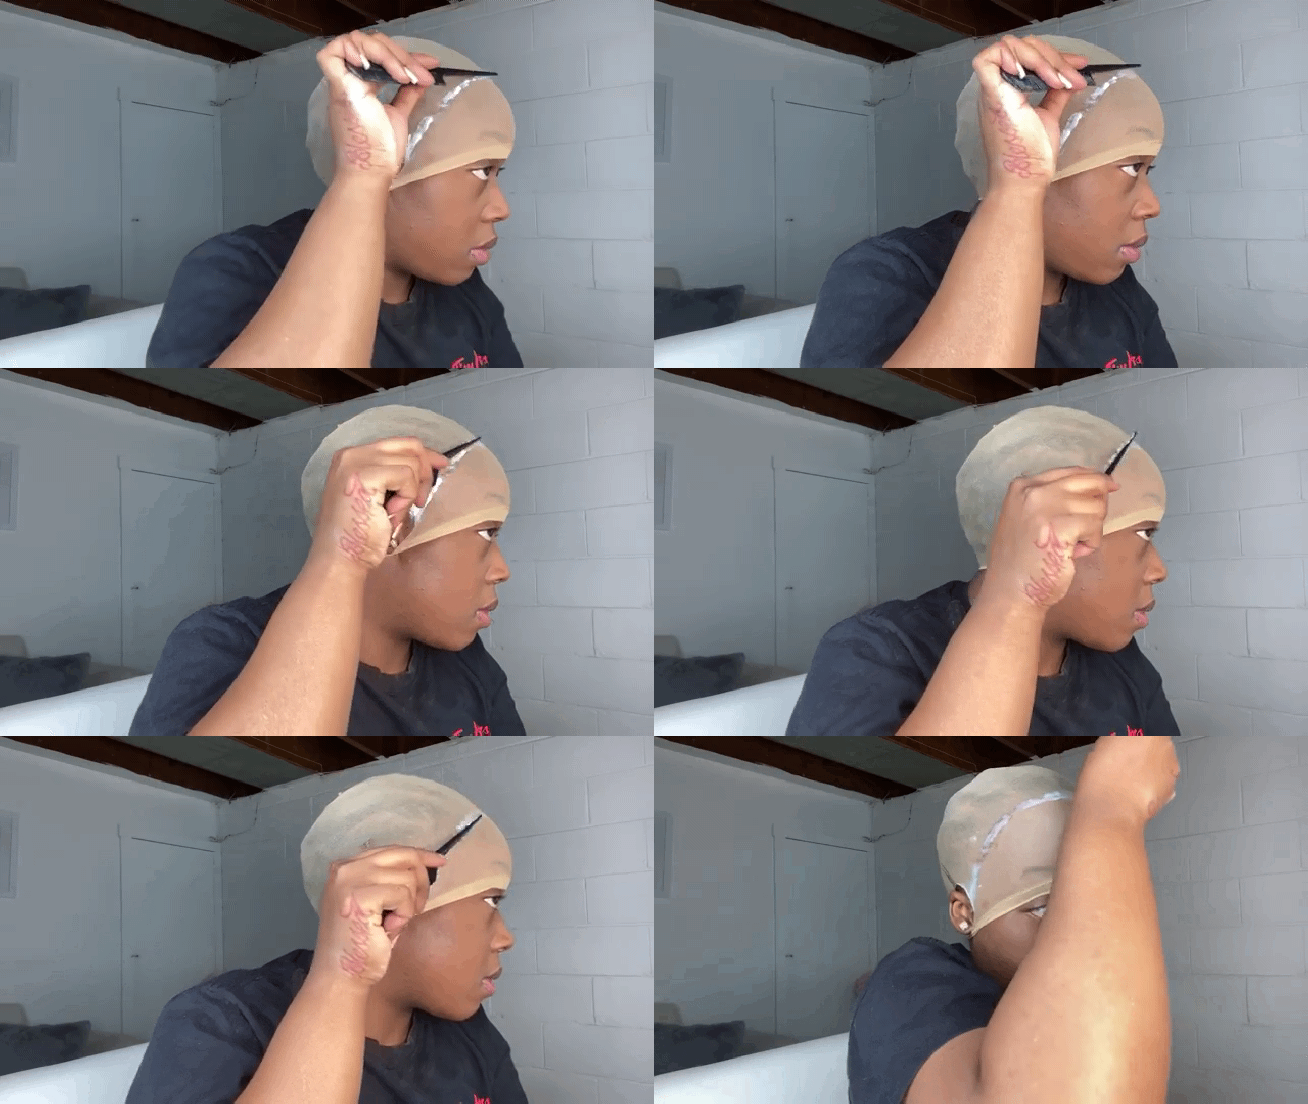
- After the application, use the tail of your rattail comb to smoothen the glue.
- When you are done, use your blow dryer to dry out the glue. This will make the cap stick to your skin, thus preventing it from rolling back.
- Using your powder brush for distribution, apply your setting powder or powder foundation behind the glue line as shown in the GIF. Also, make sure the powder matches your skin tone. This will create a seamless blend of your skin and the wig cap.
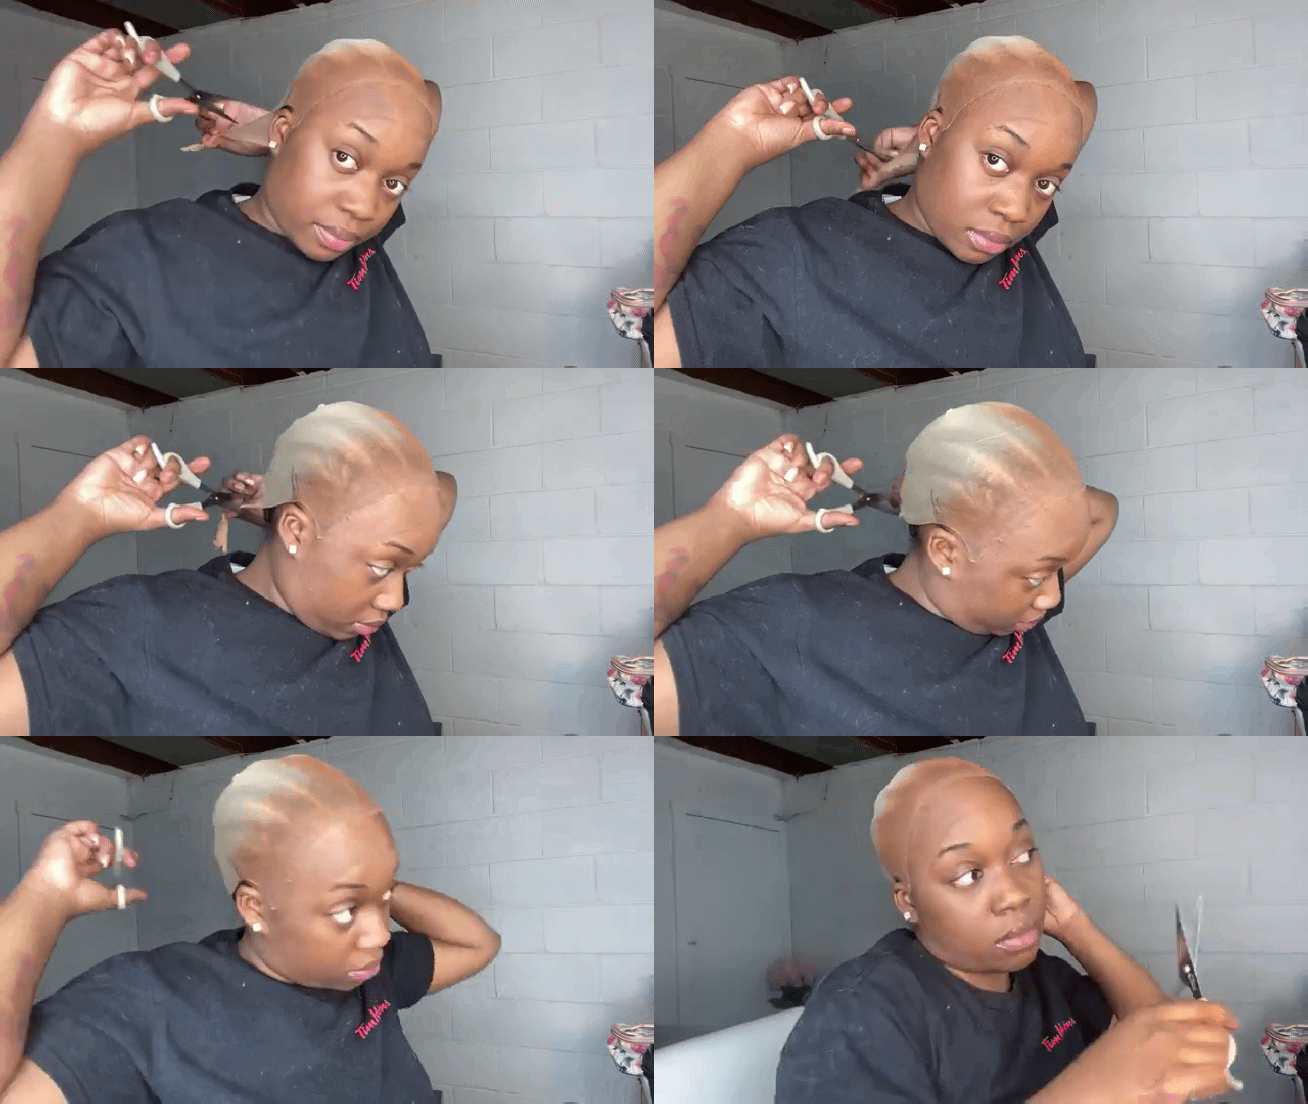
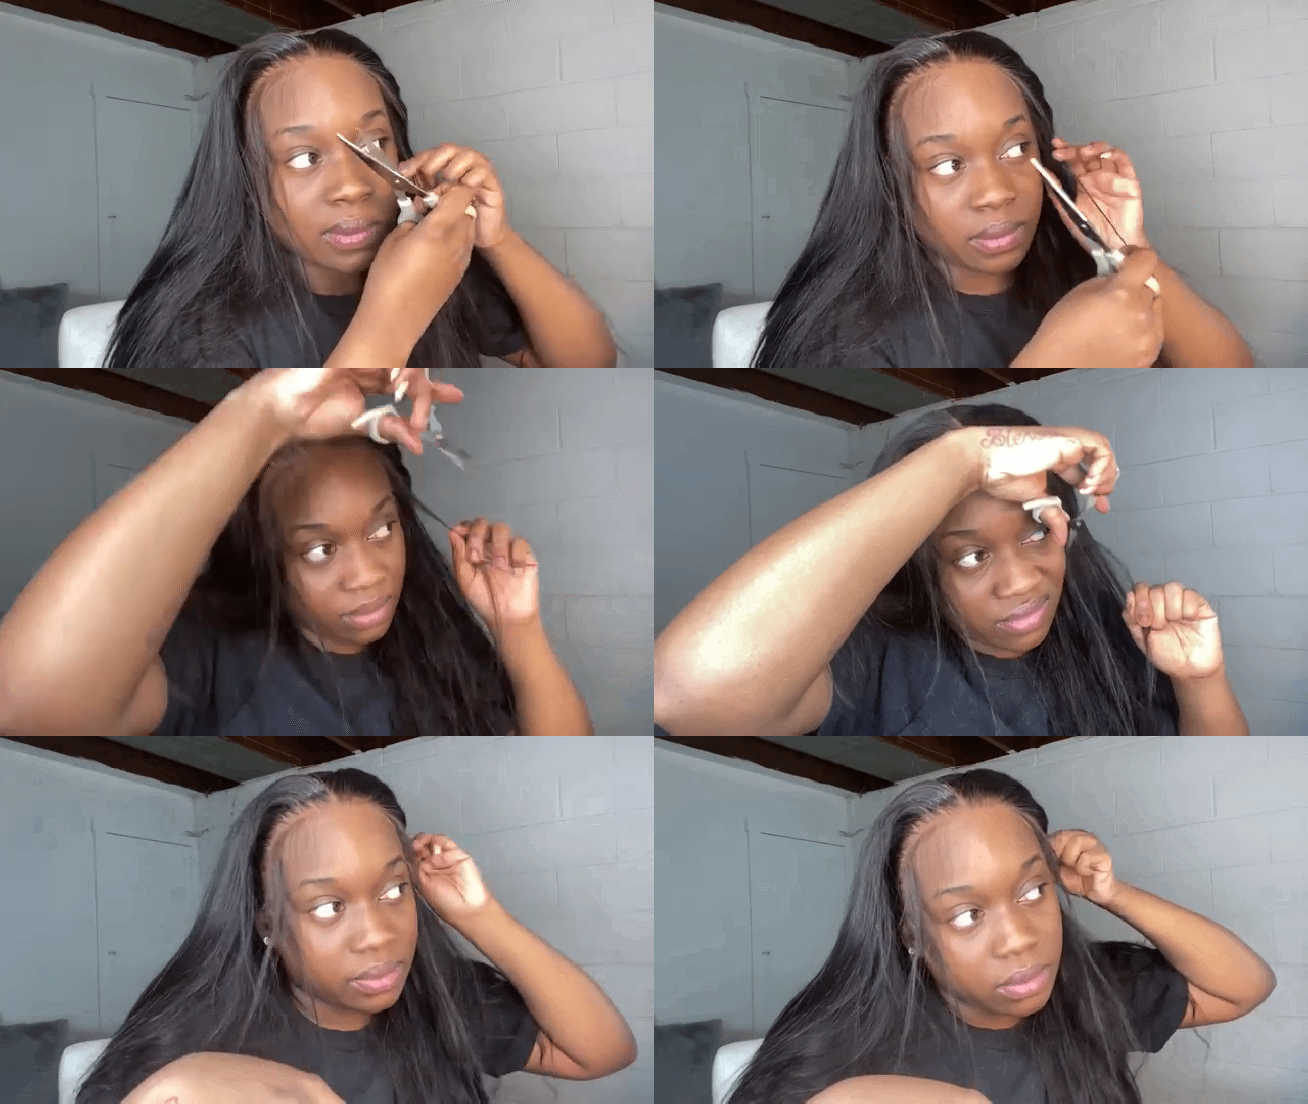
- When you are through with that, cut off the excess wig cap in front and behind with your hair scissors.
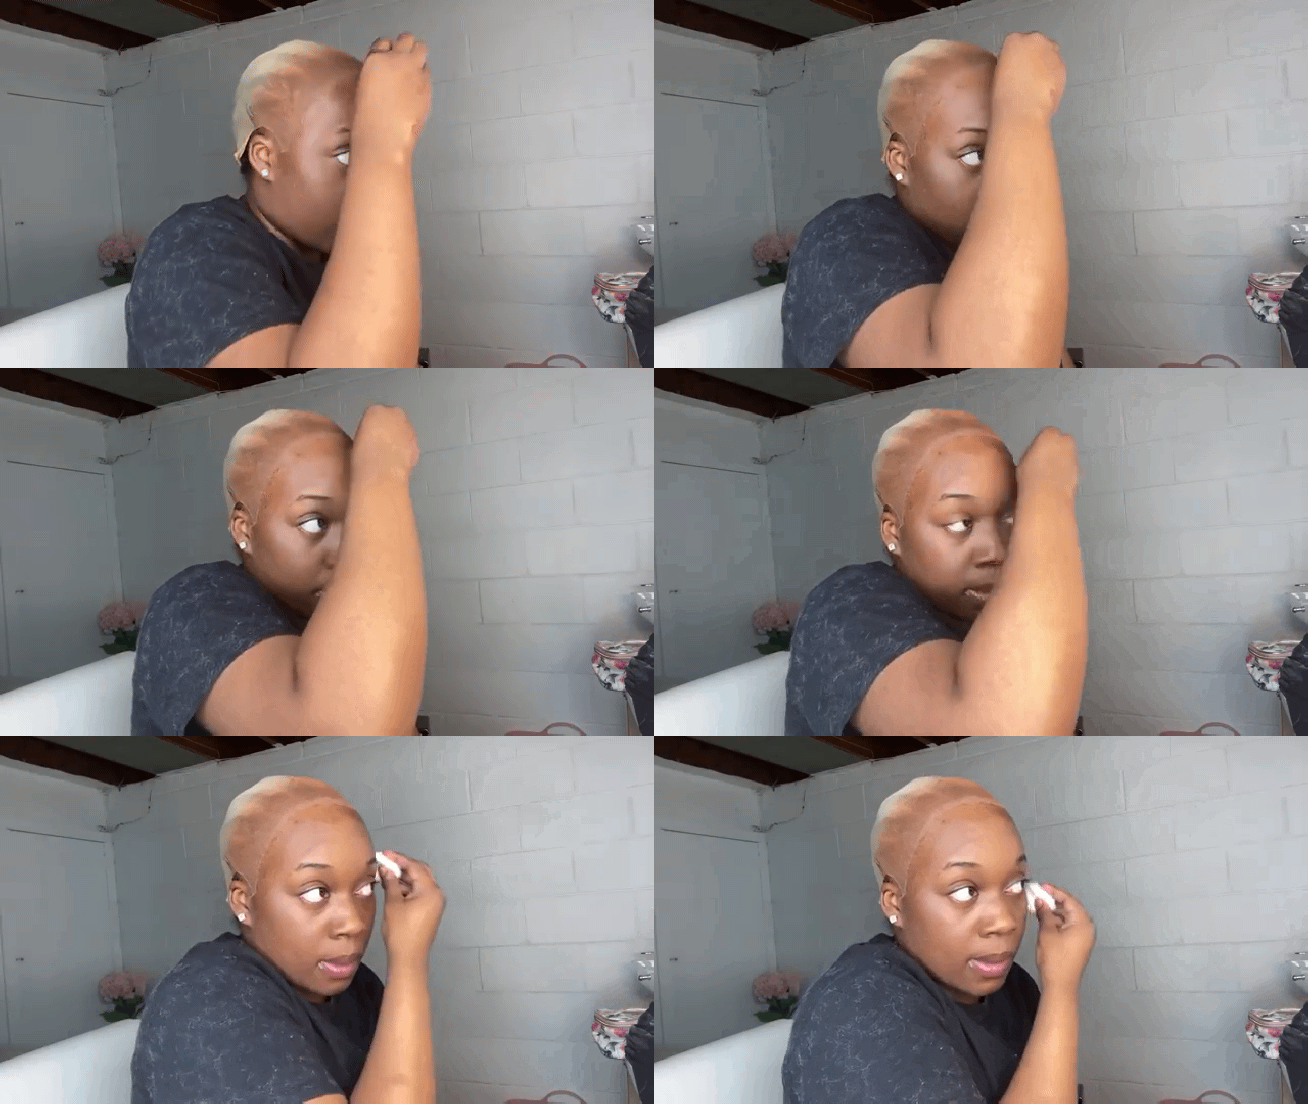
- Finally, wipe off the excess powder that got on your skin with a makeup remover and cotton wool.
2. Secure Your Wig
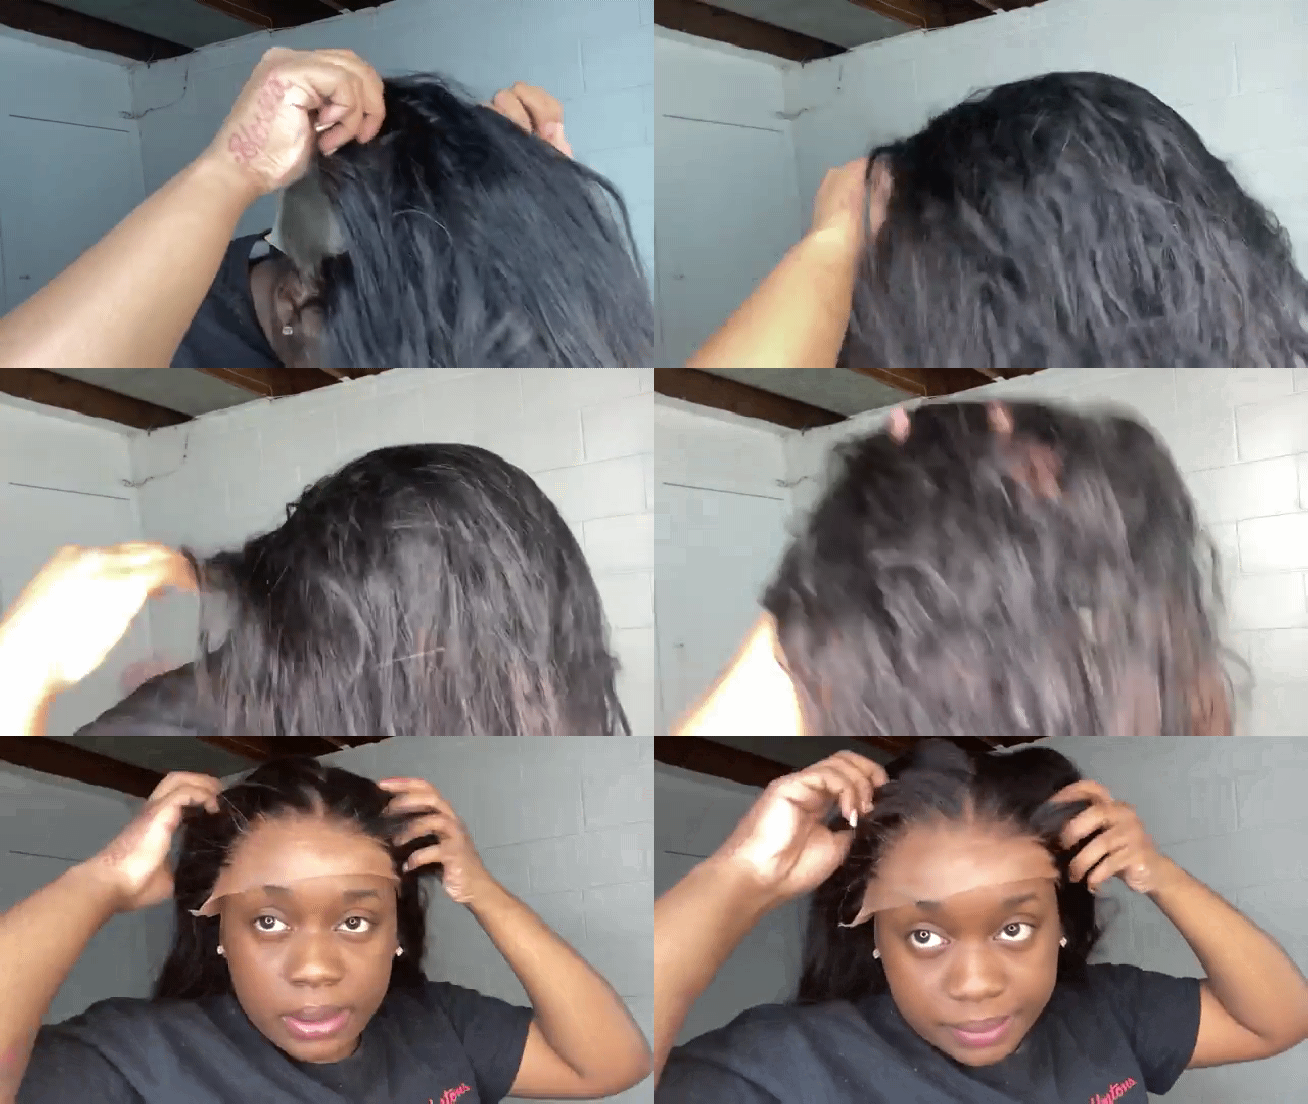
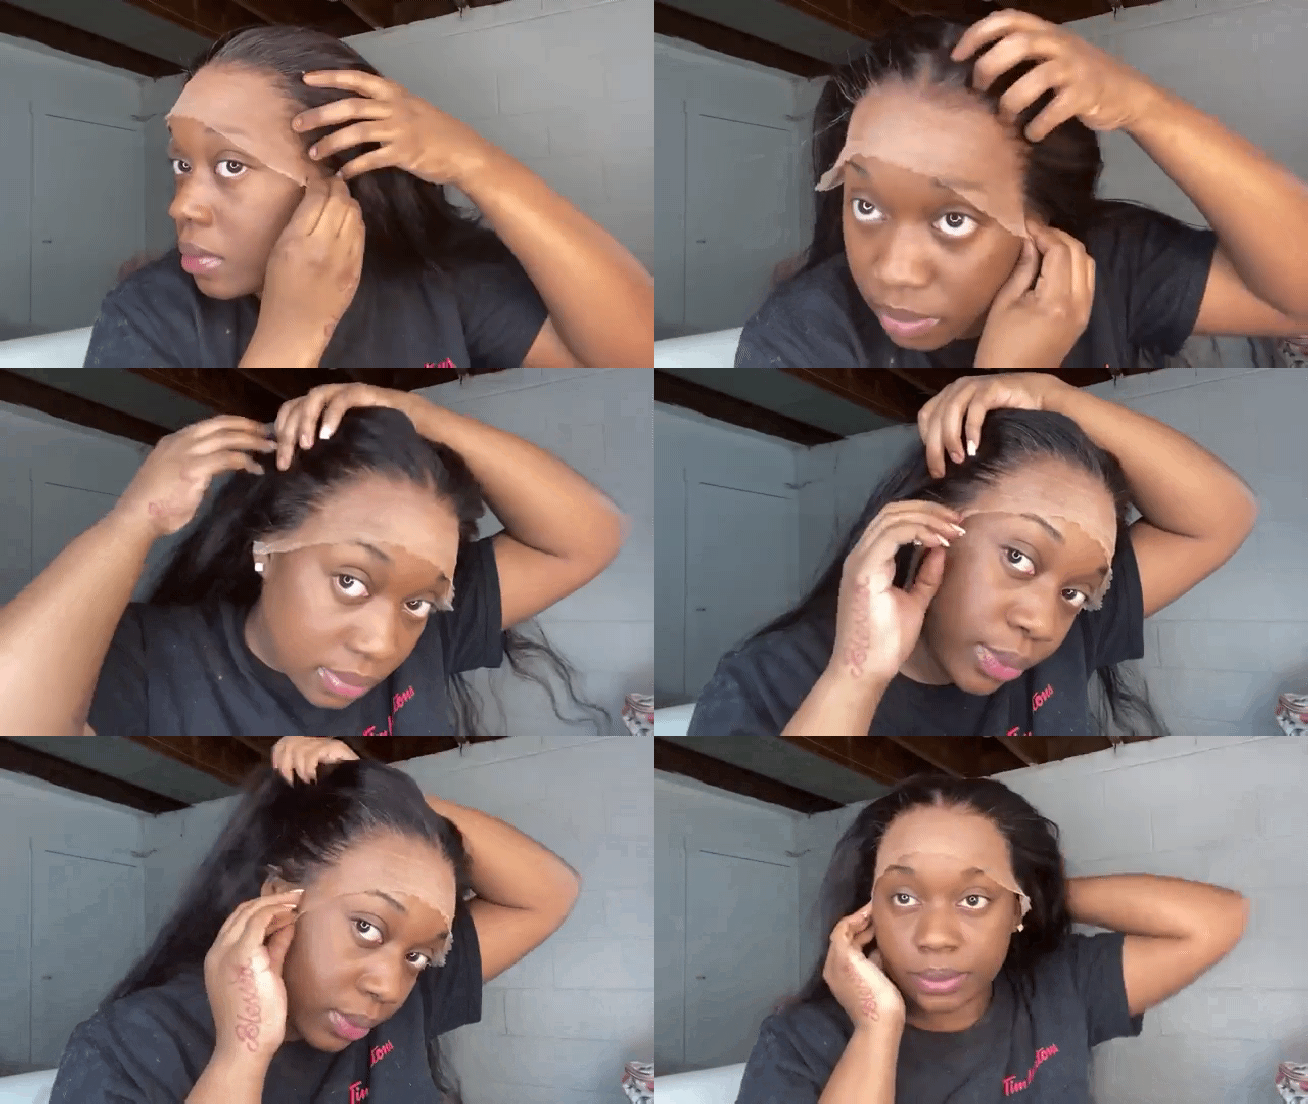
- Put on your wig and adjust it to make sure it properly aligns with your hairline. Make sure to apply your powder to the lace of the wig if it is not in your skin tone. Also, make sure to use holding spray on the lace to keep the powder from smearing onto your skin.
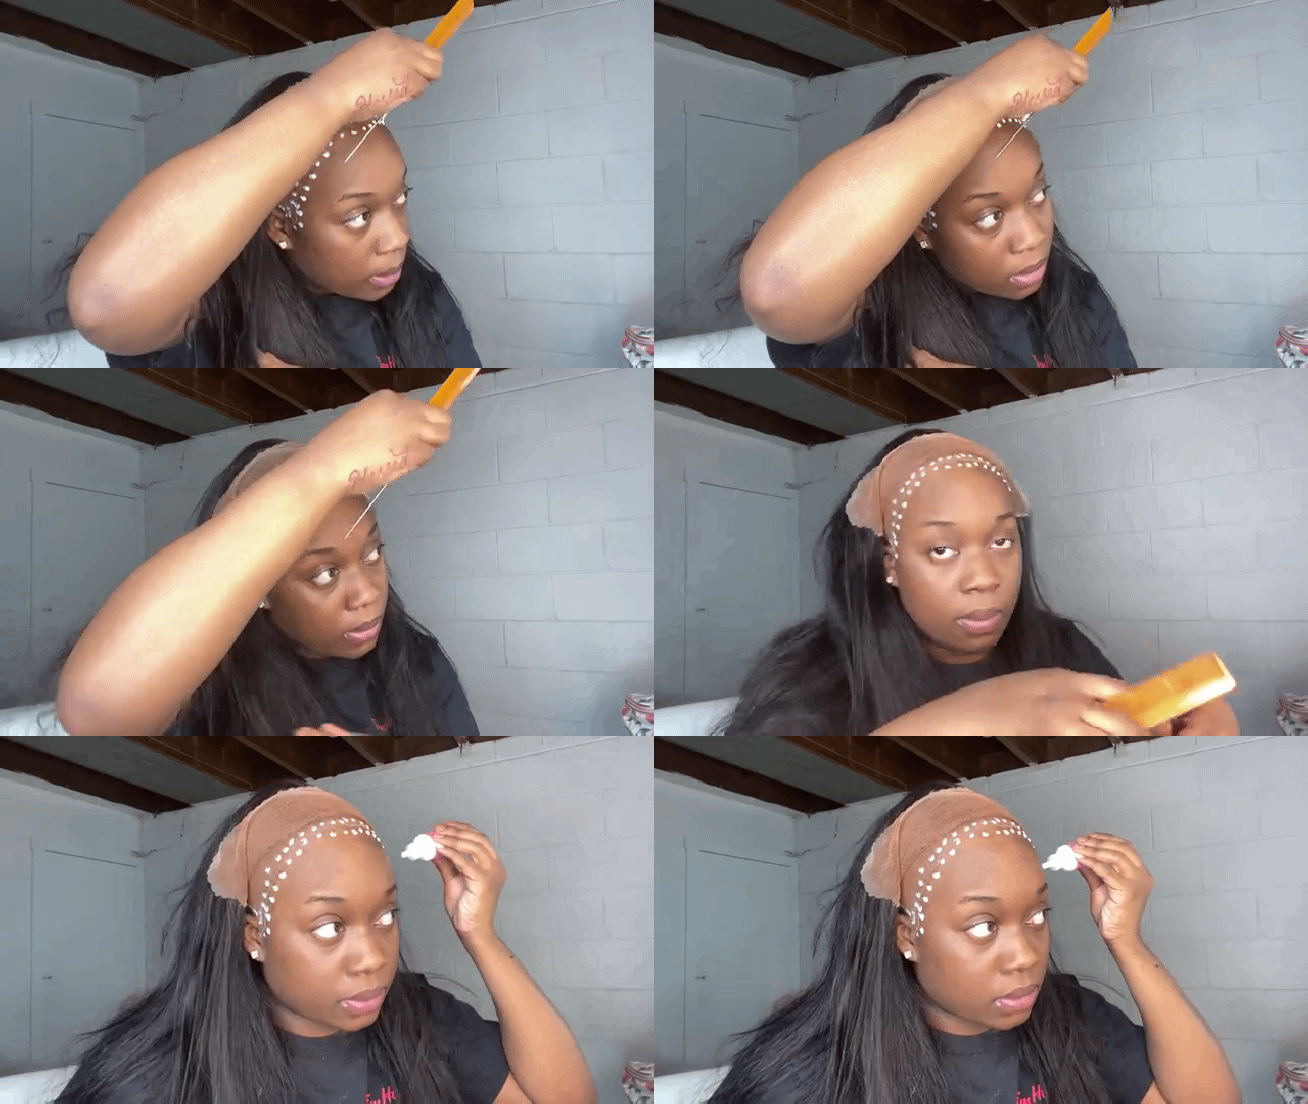
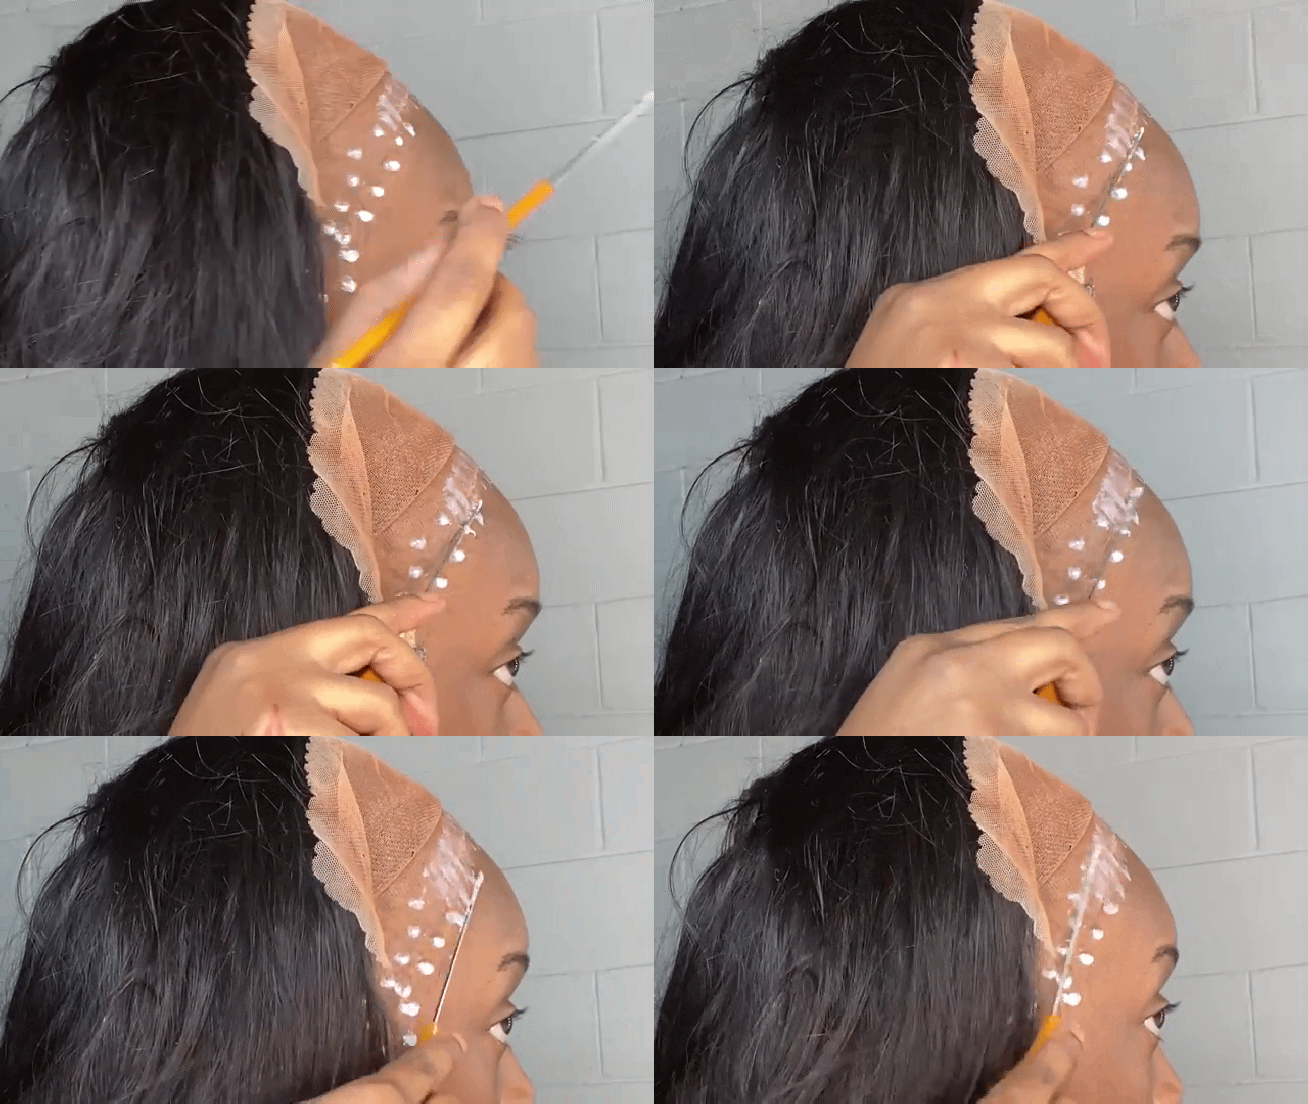
- After this, make little glue dots on your hairline with your wig glue from ear to ear.
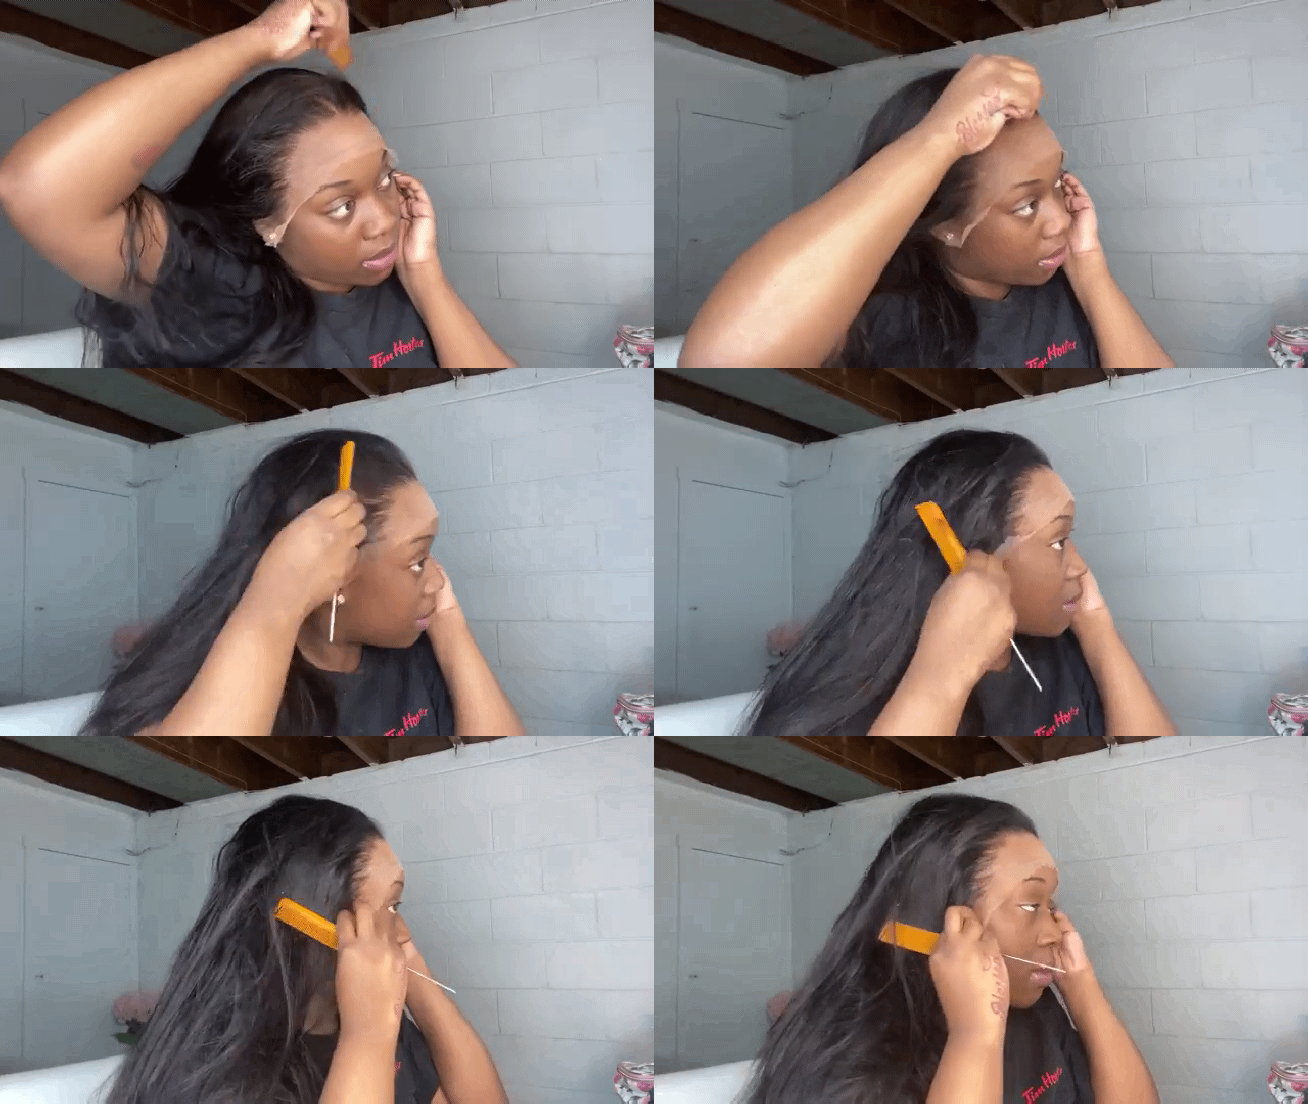
- Then use the tail of your rattail comb to smooth out the glue.
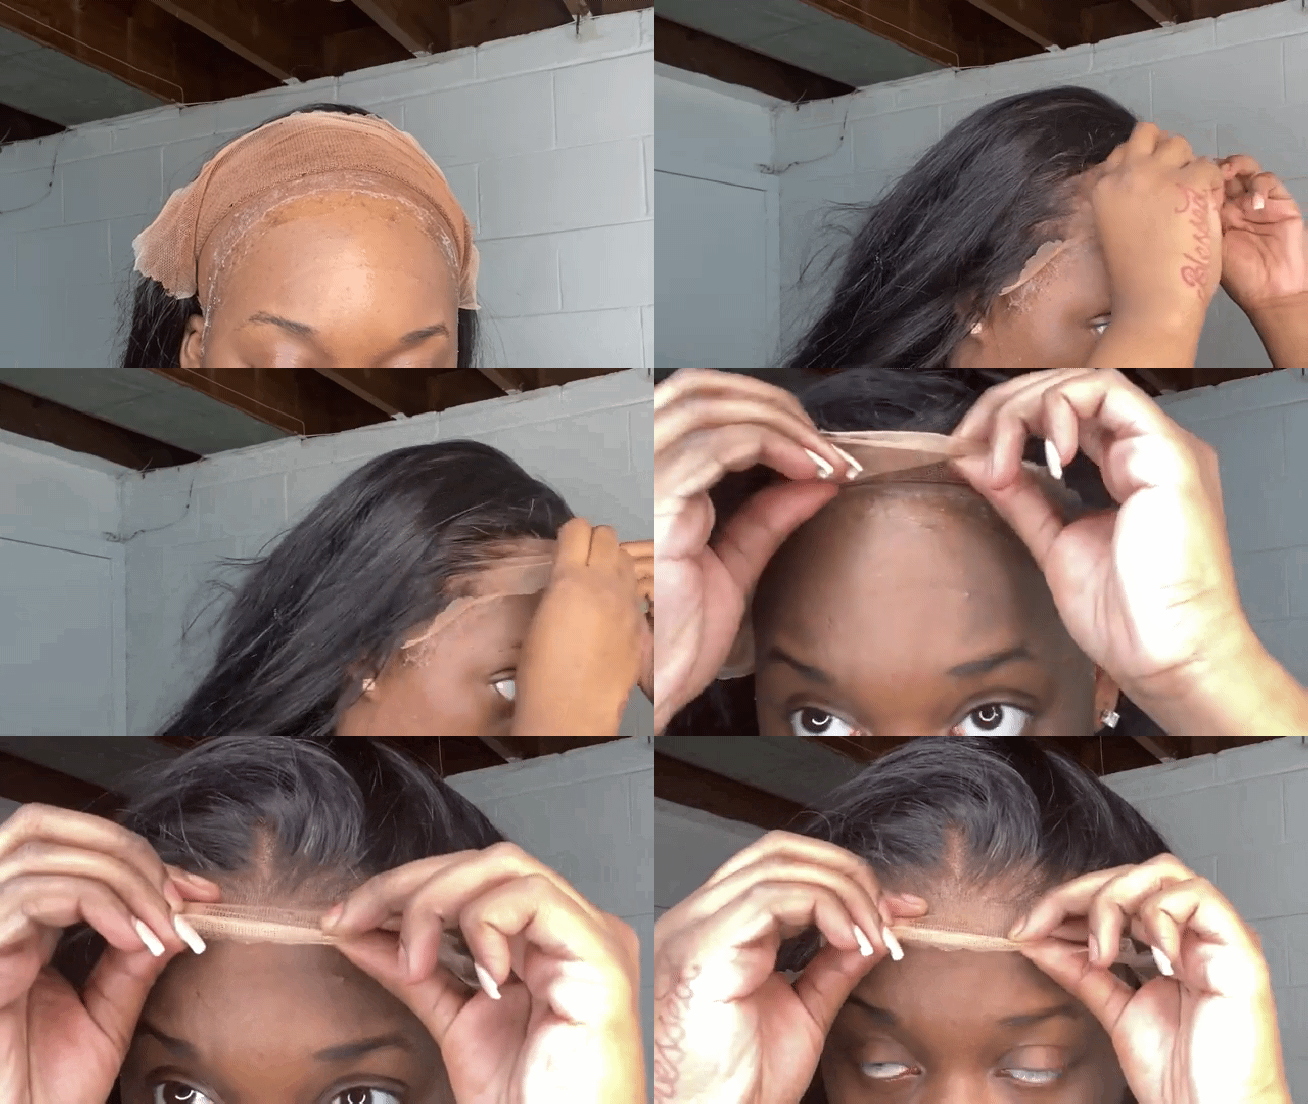
- When it’s drying out, pull the lace so that the wig’s hairline comes to sit where your glue stops. Make sure to do this gently and carefully so that the wig’s hairline is right where it should be.
- Next, with your rattail comb, gently comb the wig’s hairline back.
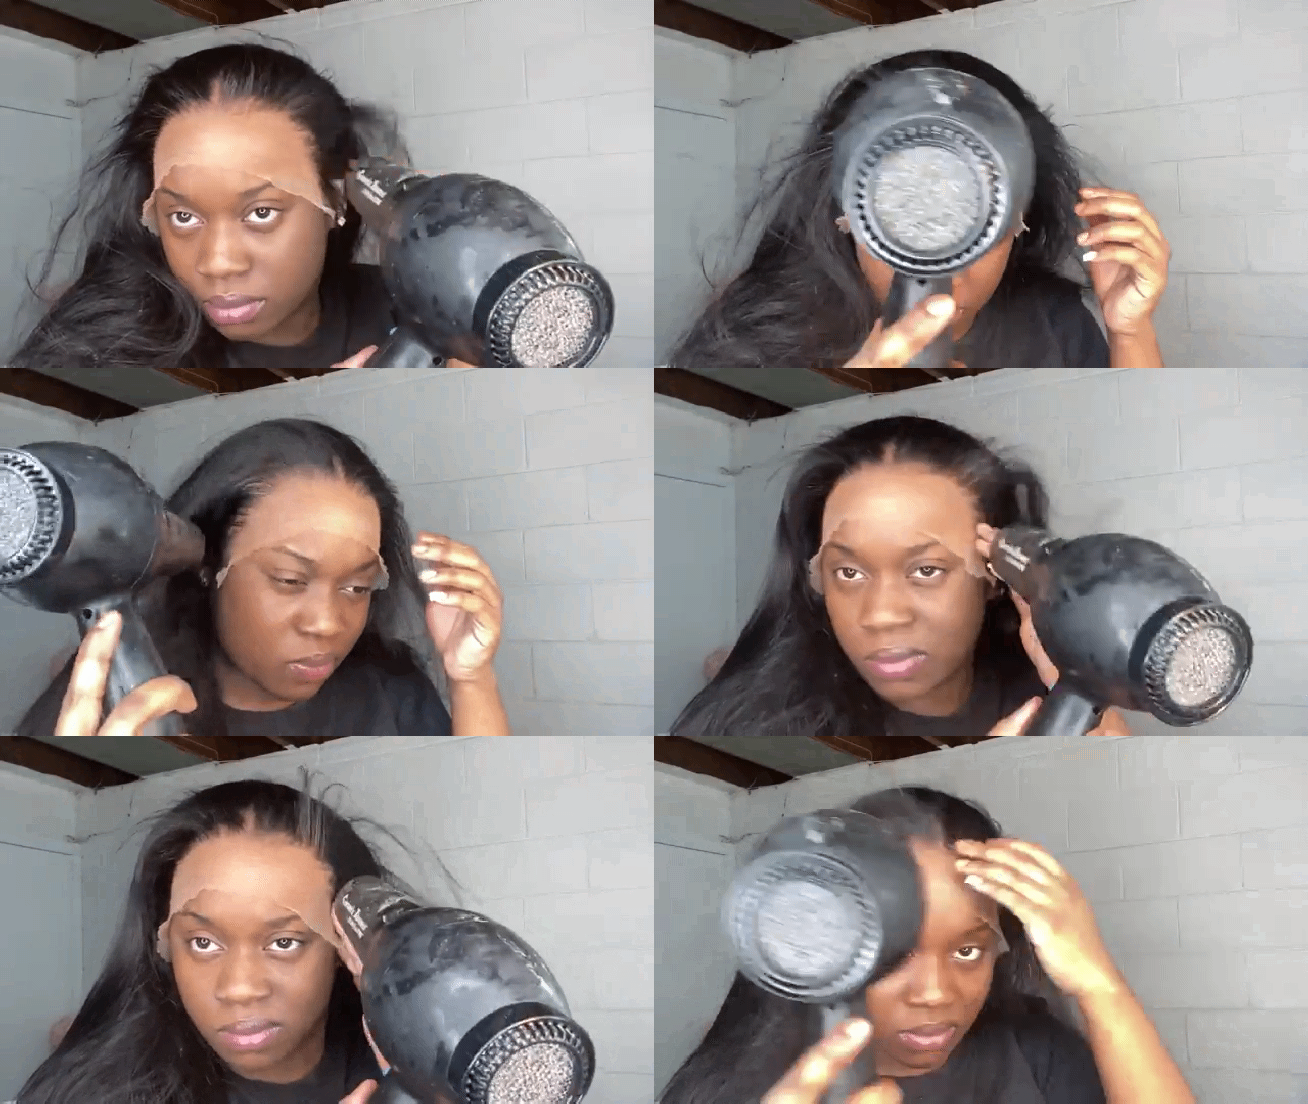
- After this, blow-dry the hairline. This will allow your lace to melt in and dry with the glue.
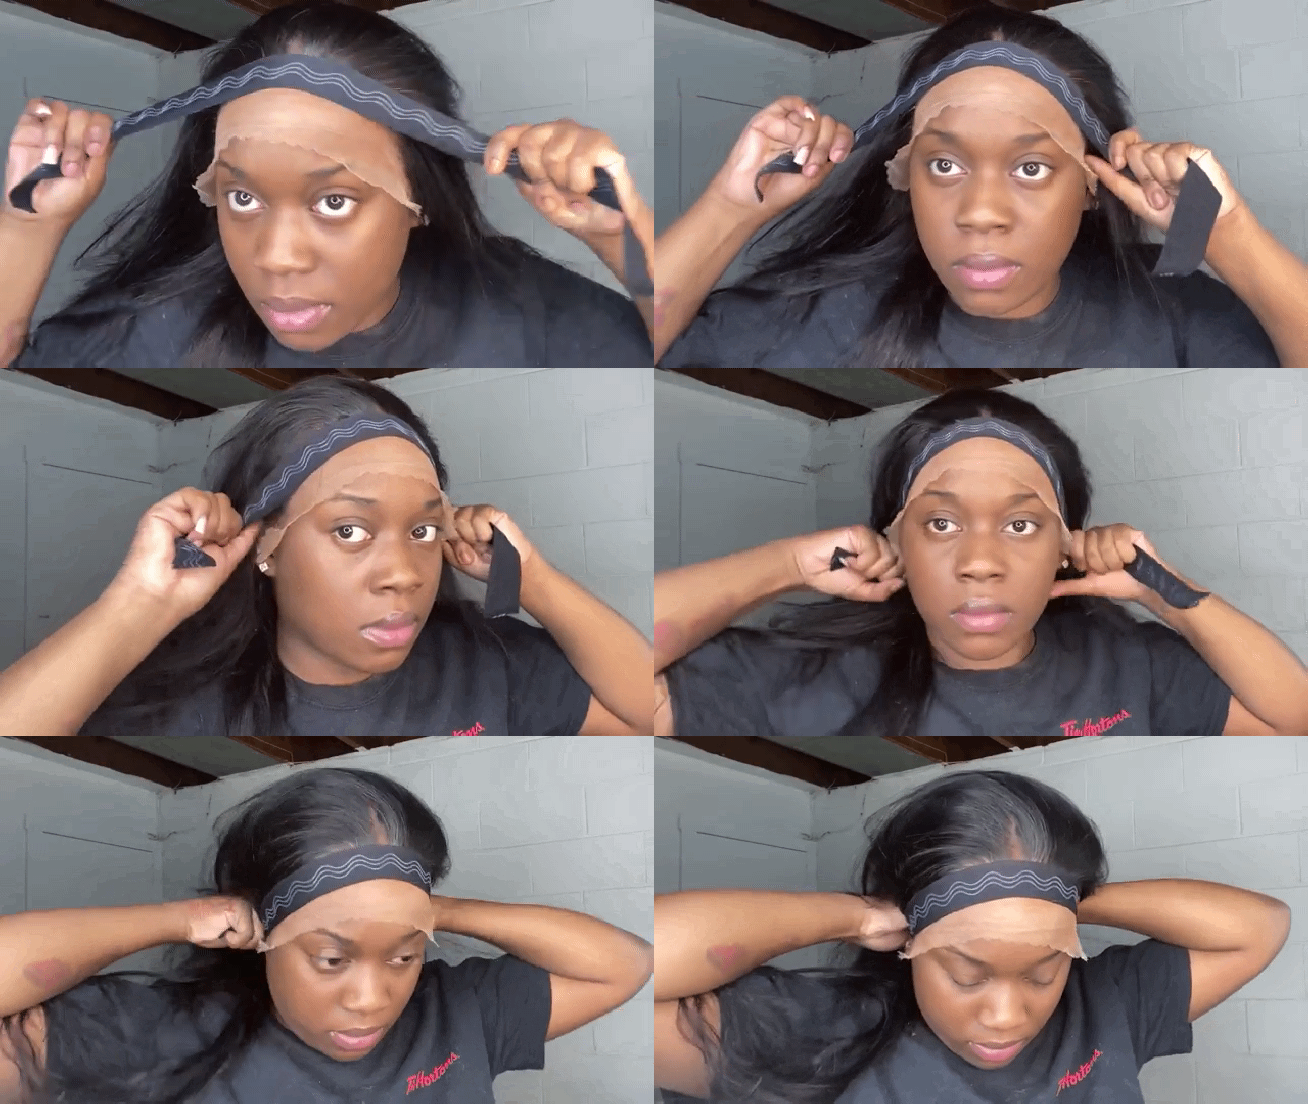
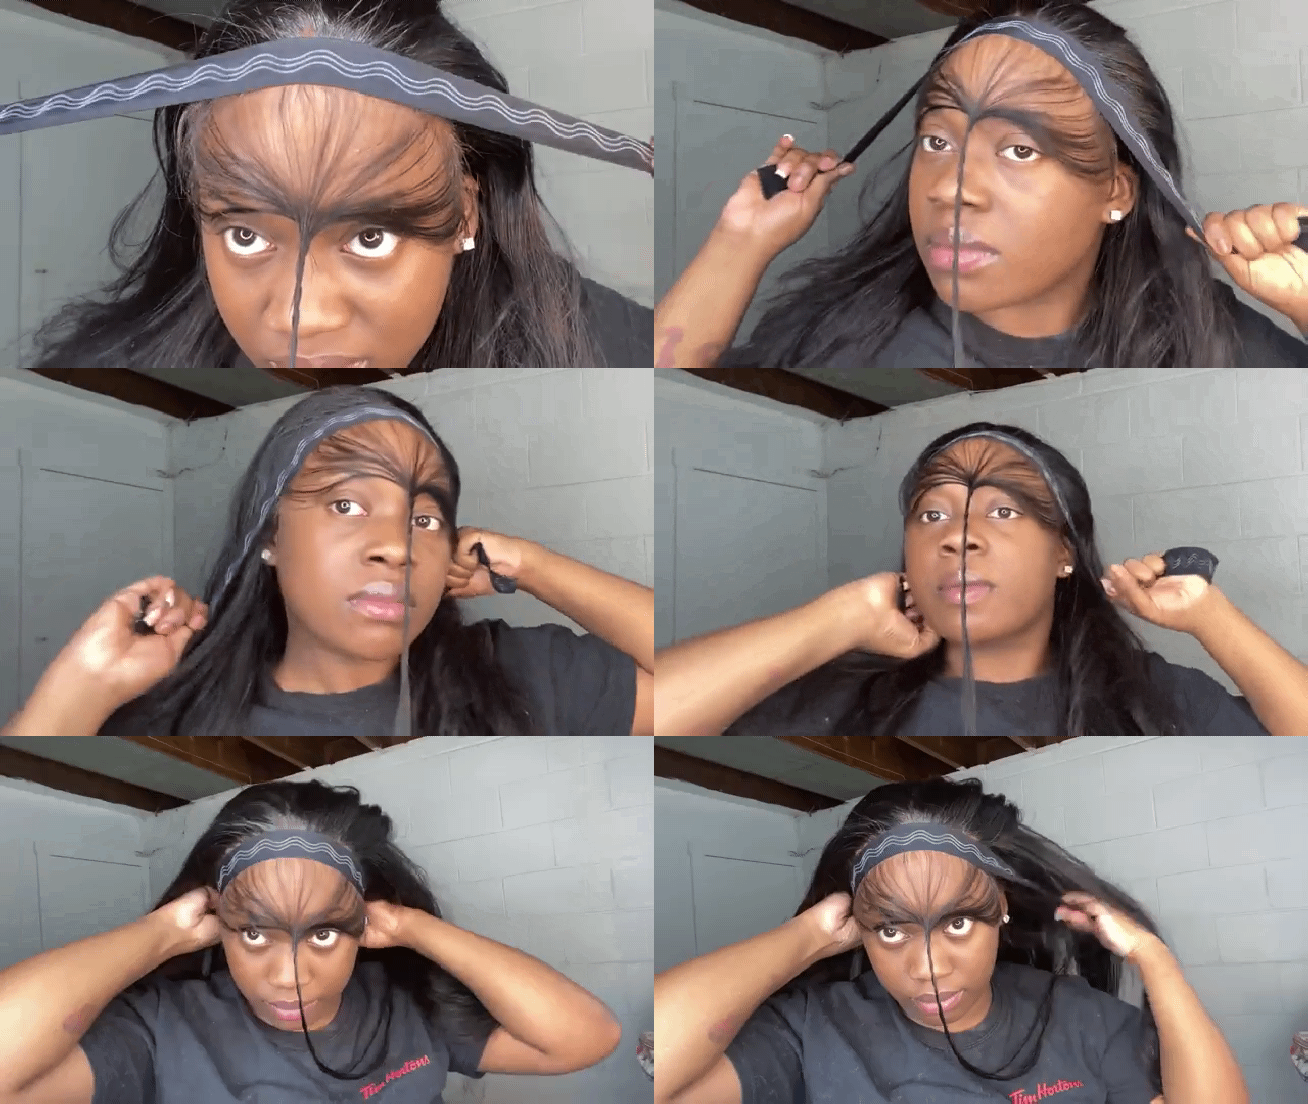
- Tie your elastic band around the hairline and leave for at least 5 minutes. You can also blow-dry again.
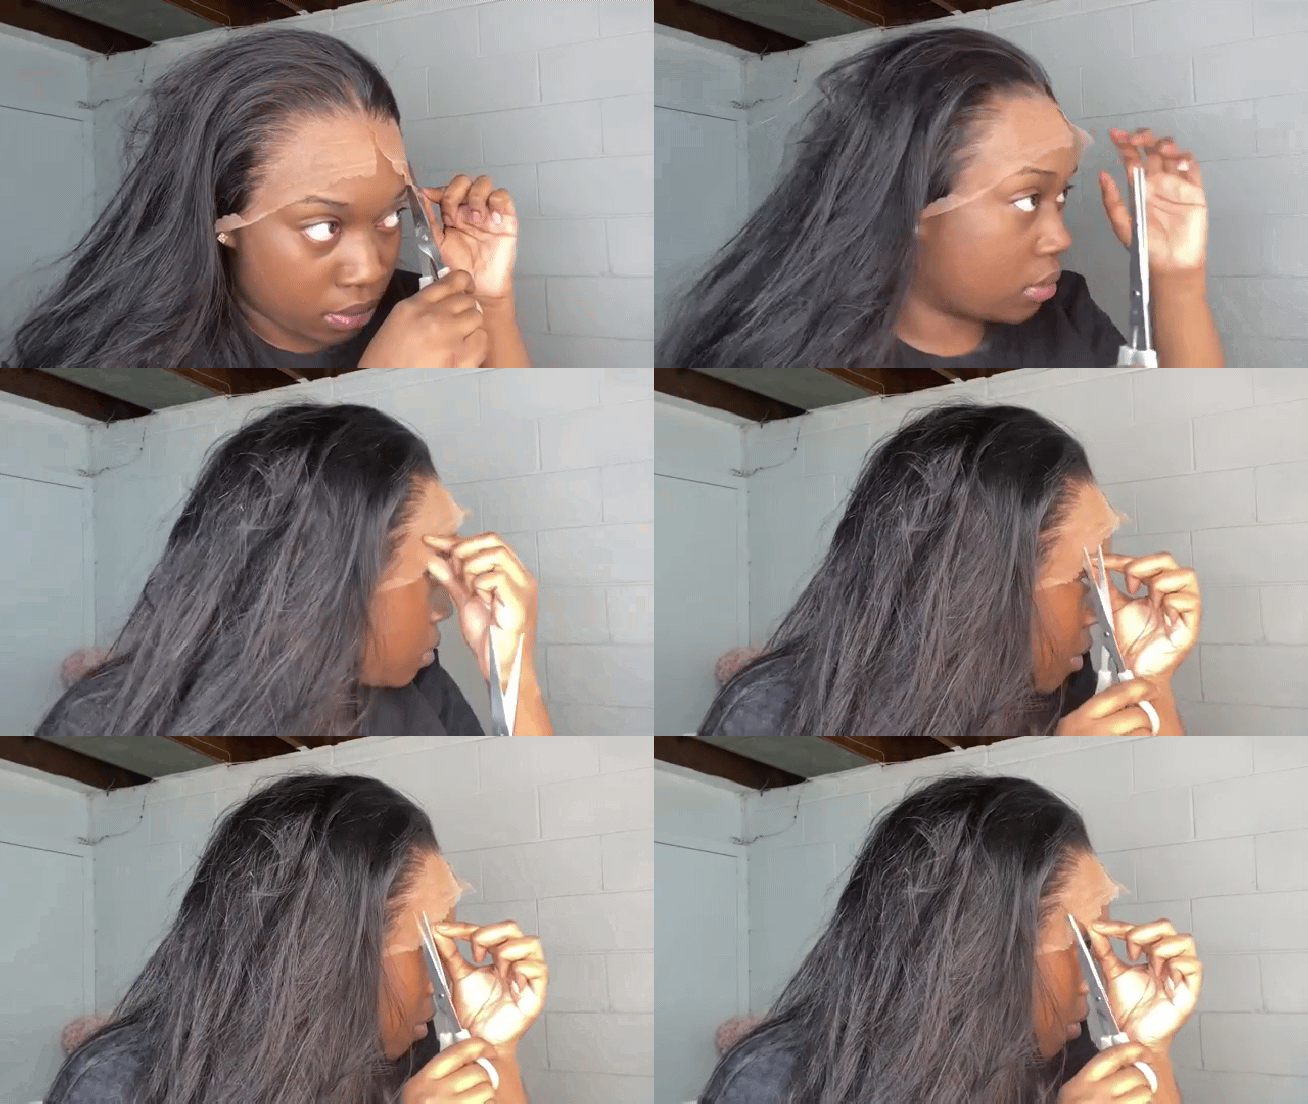
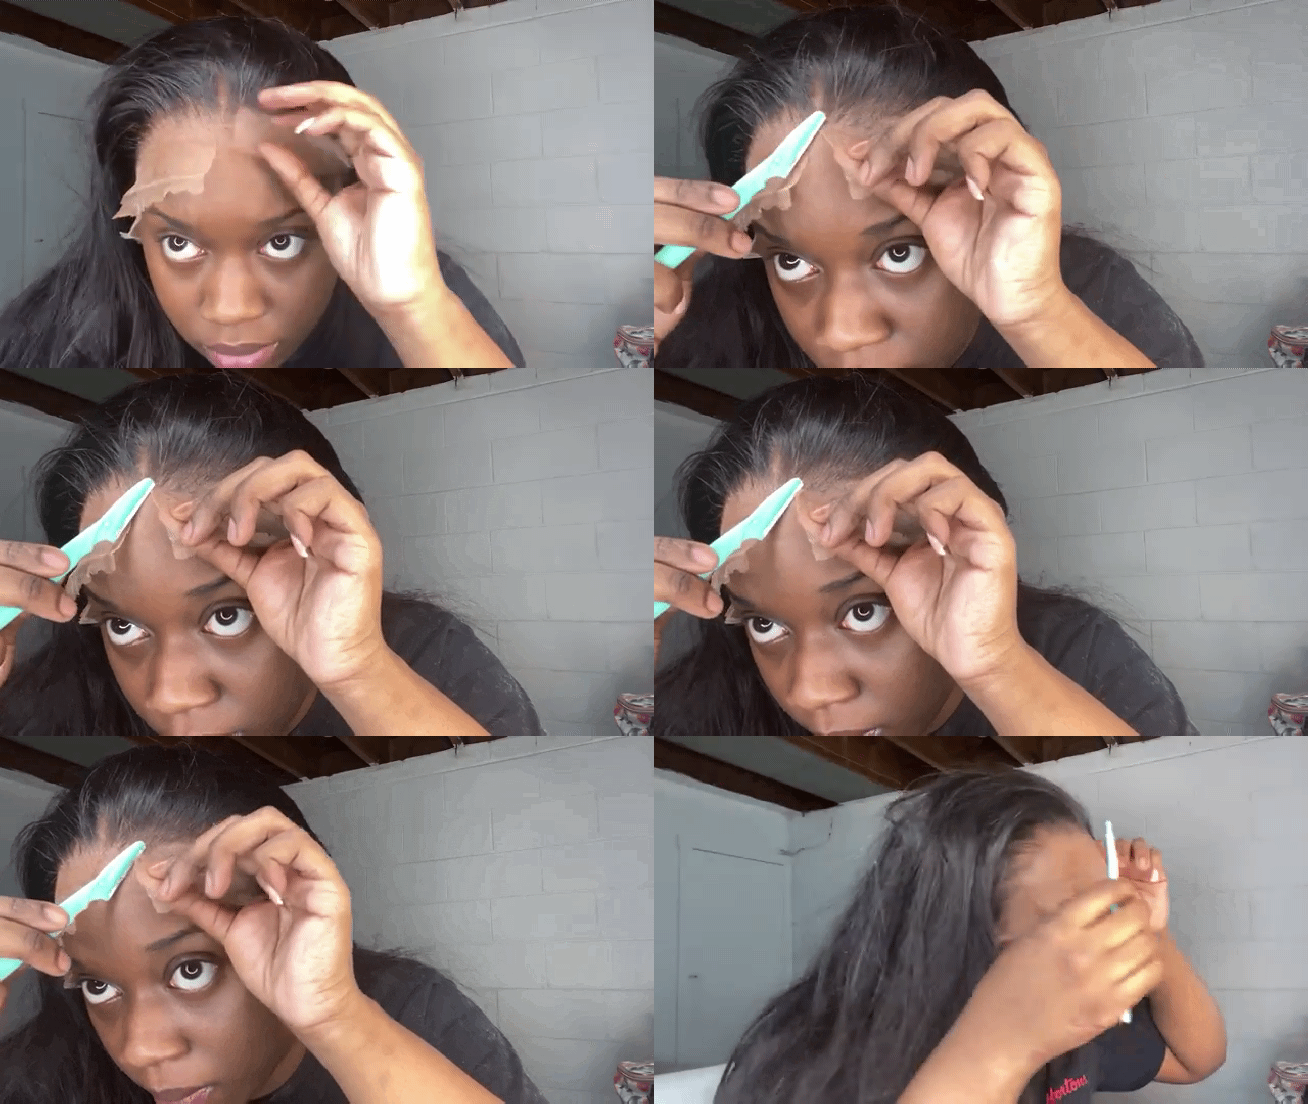
- The next thing to do is to use your hair scissors to make cuts from the mouth of your lace, up close to the hairlines.
- After this, use a hair razor to trim off the lace in a zigzag motion.
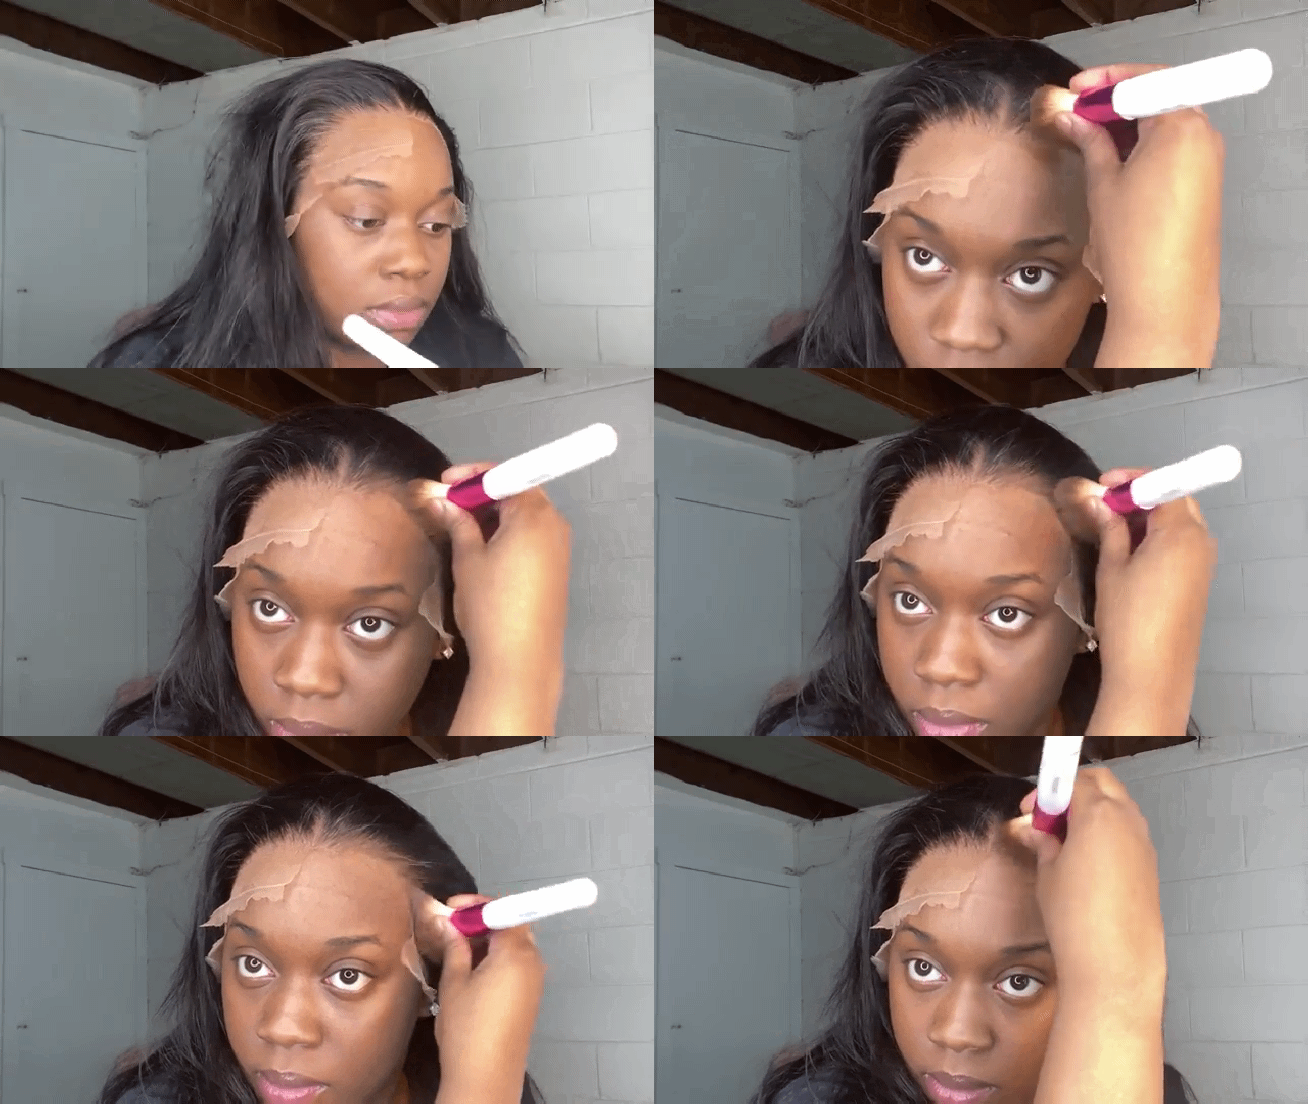
- After trimming, apply your setting powder or powder foundation again to the hairline. This will help give that final perfect blend.
3. Style Your Wig
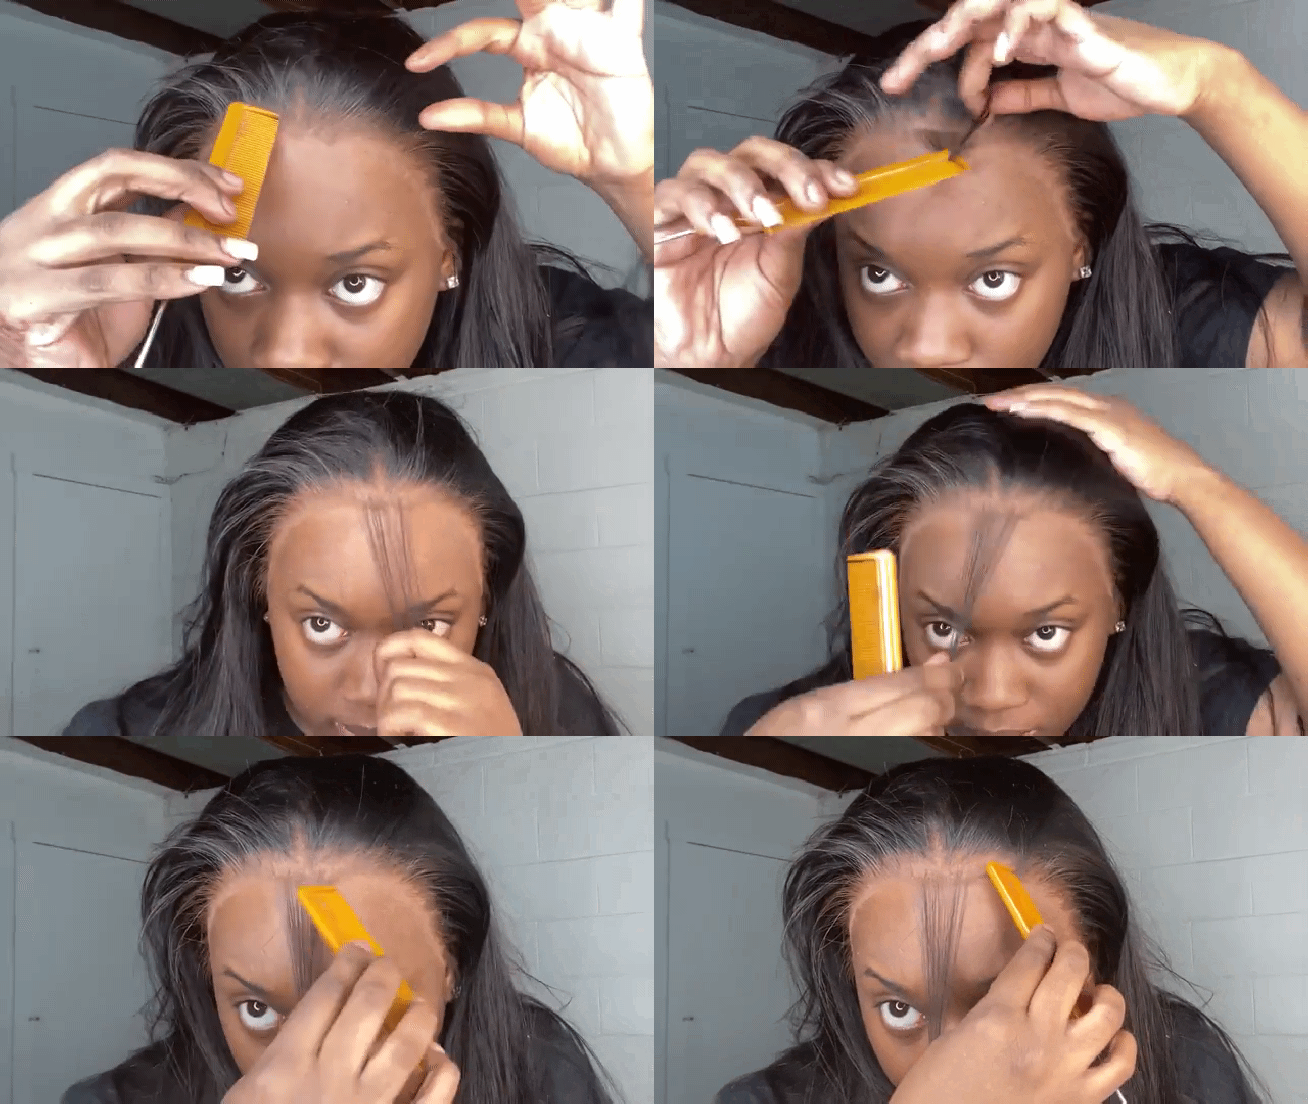
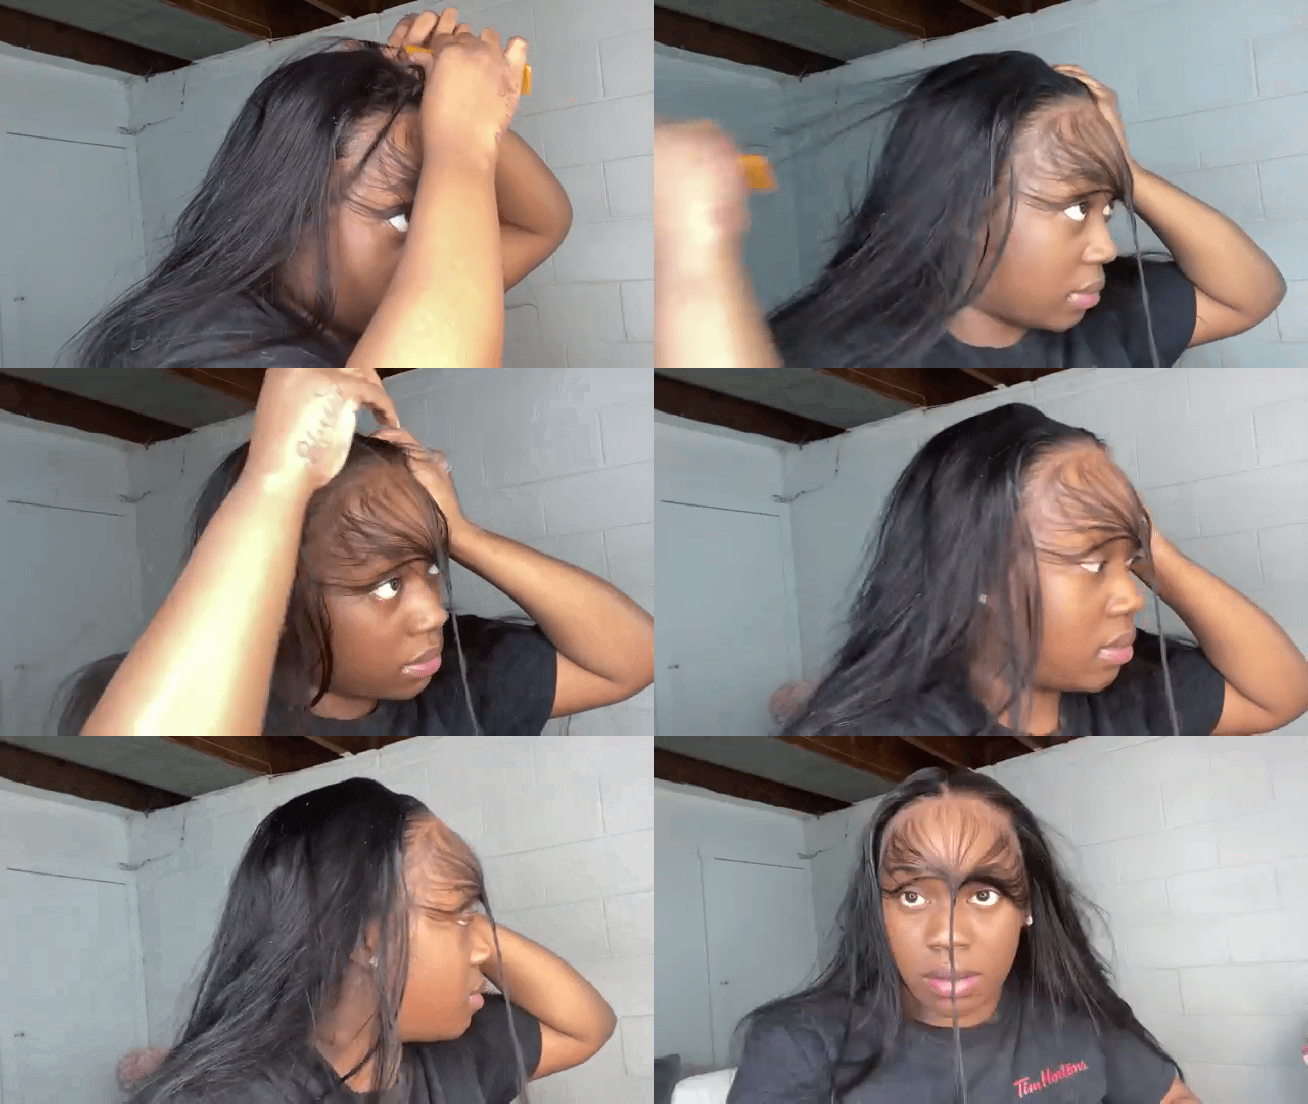
- What you want to do now is to part out some strands of front hair from ear to ear. This is what you will need for your baby hair.
- Hair tip: Part out tiny strands of hair for a more realistic look.
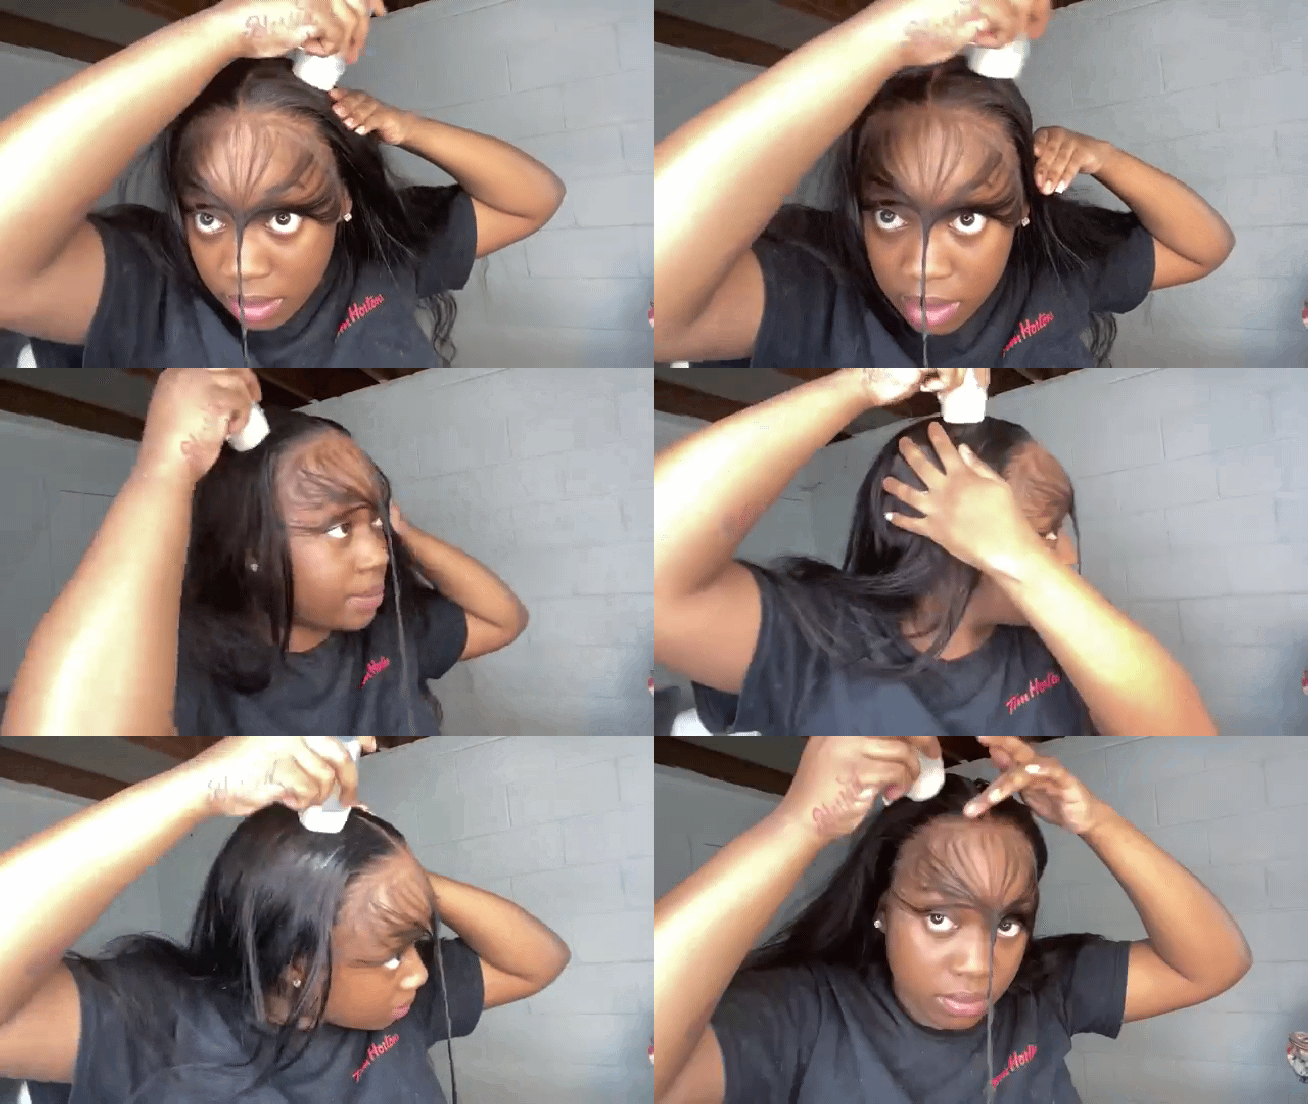
- When you are done parting, spray your holding spray on the parted line. This will help keep the baby hair separated from the rest of the hair.
- After that, wrap your elastic band directly on the sprayed hairline and leave it for a few minutes to dry.
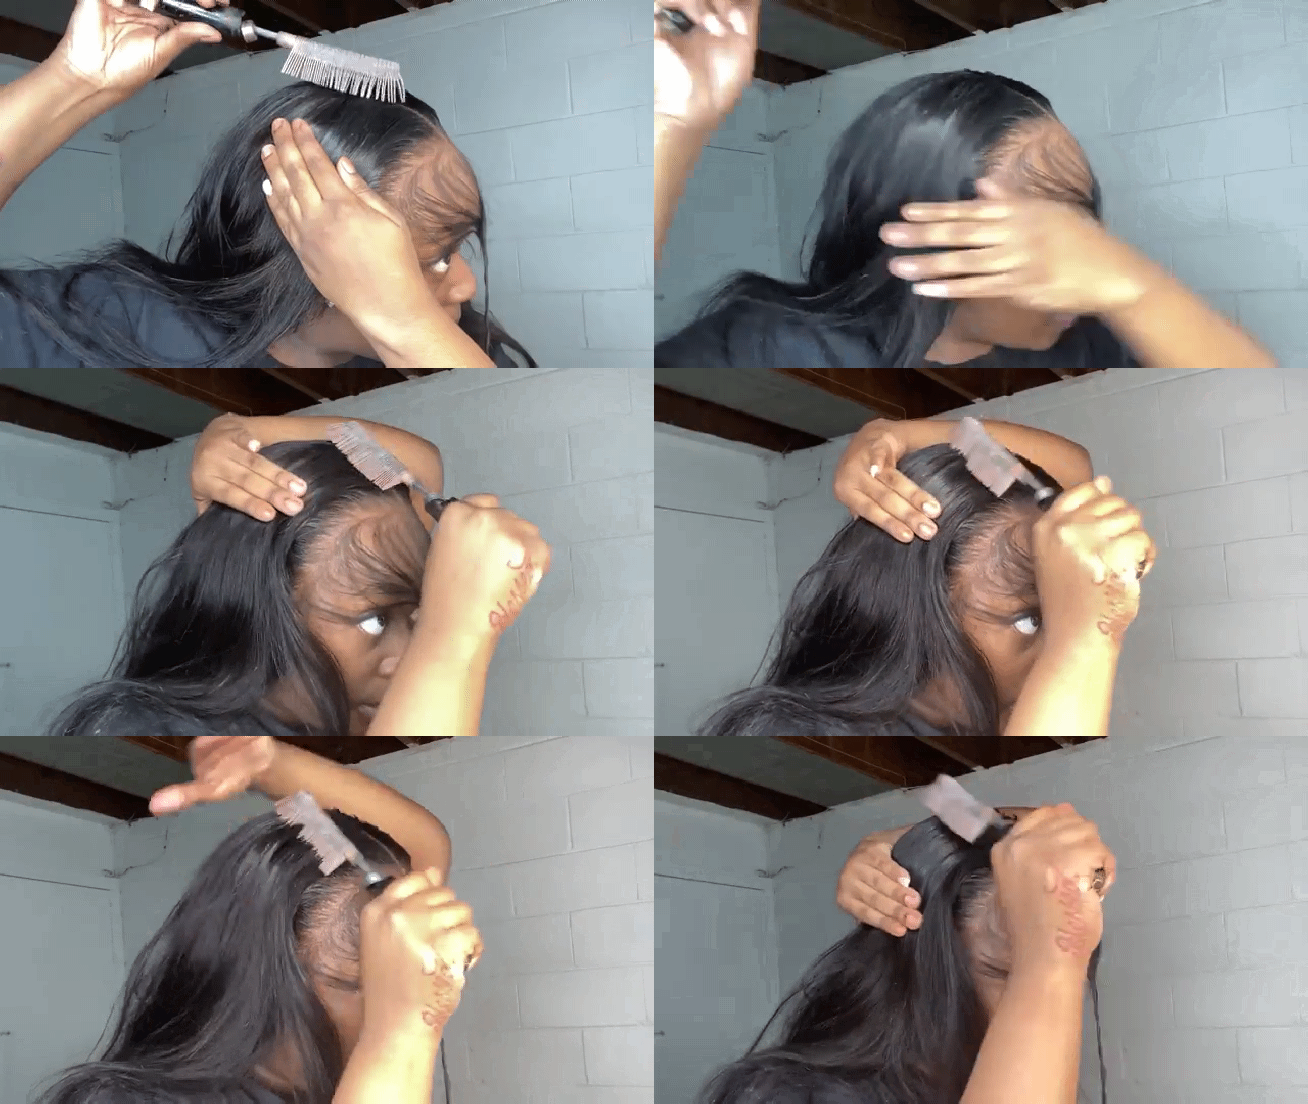
- The next thing to do is part your hair. Here, you can choose to do a middle or a side part.
- After this, rub your hair wax on the top of both sides of the part. This will lay the hair down and also give it some shine.
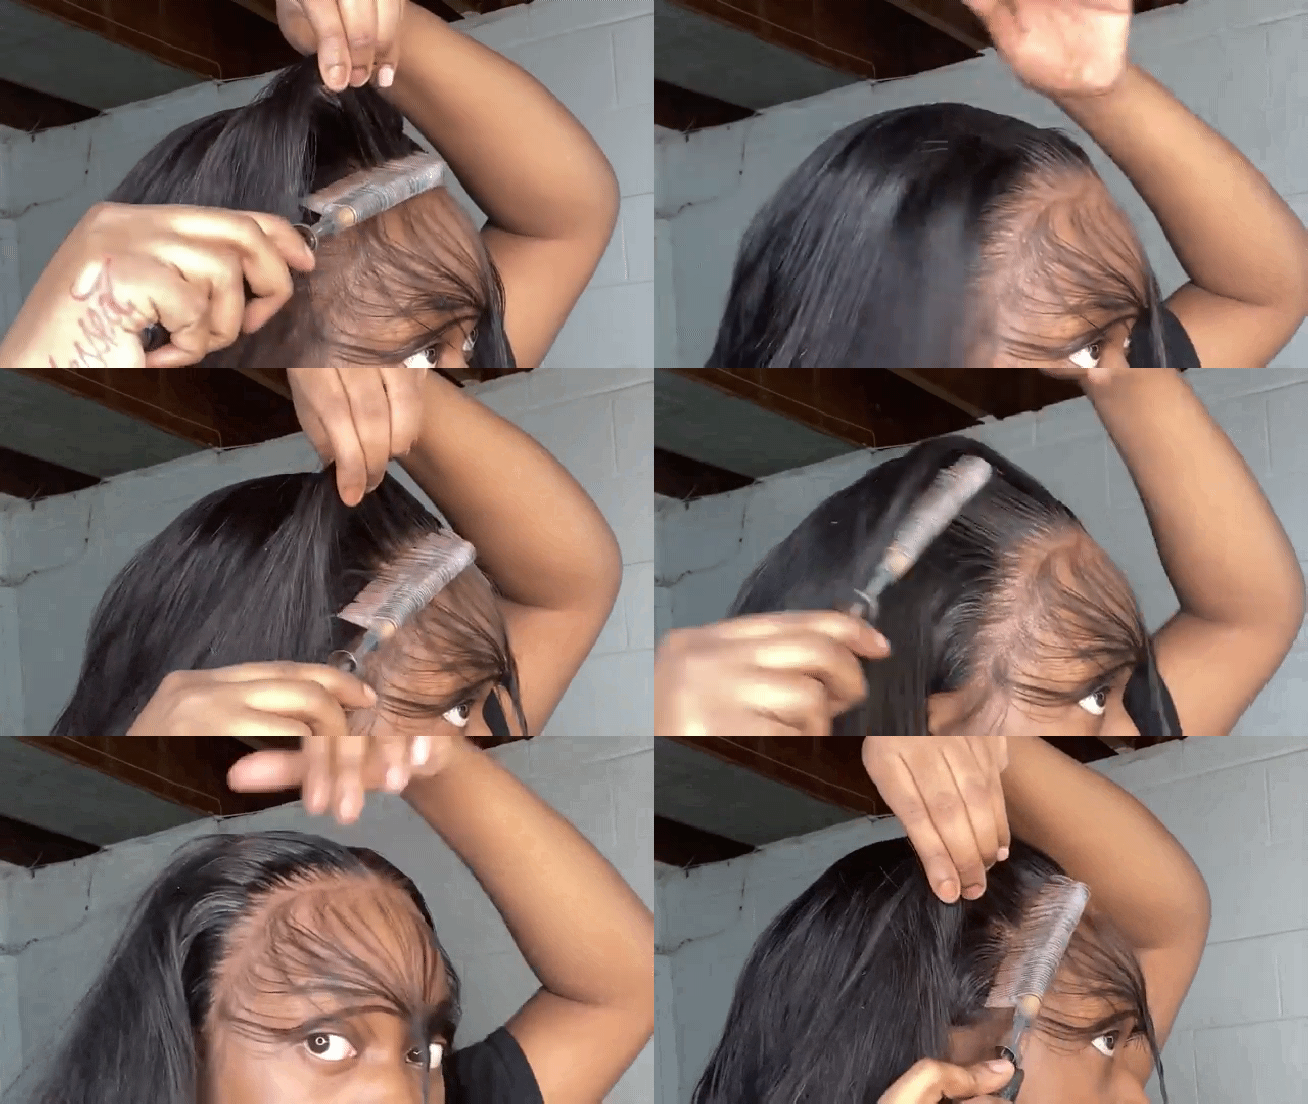
- Next, go in with your pressing comb to make your hair flat.
- After you have the hair all pressed out, apply some more holding spray. You should also use your rattail comb to comb out the hairline gently for a straight part between your hairline and the baby hair. This will make your installation neat and sleek.
- Blowdry again.
- After this, trim your baby hair as styling long baby hair will make your installation appear unrealistic.
- Apply your edge control and use your edge brush to make your desired swoops.
- Hair tip: For that extra sleek look, you can use a hair straightener to straighten the entire wig. If you would prefer curls or waves, then use a curling iron.
And good job, you have successfully learned how to put on a wig.
Frequently Asked Questions About How To Apply A Wig
Can I apply a wig to my short hair?
Yes, you can apply a wig directly on your short hair if it is in the teeny weeny afro (TWA) stage.
How do I make my wig fit tighter?
You can wrap a headband, scarf or toupee clips to keep your wig tighter.
Can I put on my wig to bed?
No, you should remove your wig before bedtime. If you don’t do this, the wig will get matted and tangled up as you sleep.
Conclusion
As a beginner, your first wig installation may be tasking. Do not give up easily. In time, you will master how to put on a wig.








 No products in the cart.