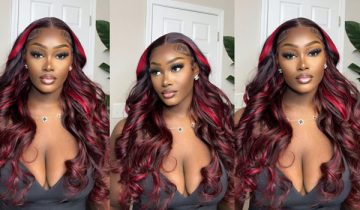
Pixie cut wigs have been a popular choice for those looking to change their hairstyle dramatically without committing to a short haircut. Whether you want to experiment with a new look or simply need a wig for a costume or event, making your own pixie cut wig can be a cost-effective and creative solution. In this comprehensive guide, we will walk you through the process of making a pixie cut wig, from selecting the right materials to styling the wig for your desired look.
1. Introduction.
Pixie cut wigs are known for their short and chic style, offering a low-maintenance alternative to the traditional long wigs. They are ideal for various occasions, such as costume parties, cosplay events, or daily wear. Making your own pixie cut wig allows you to customize the length, texture, and color to match your unique preferences.
Creating a pixie cut wig may seem like a complex task, but with the right materials and a step-by-step approach, you can achieve the look you desire. In this article, we will guide you through each stage of the process, so you can create a stunning pixie cut wig at home.
2. Materials and tools.
Before you begin crafting your pixie cut wig, it’s essential to gather all the necessary materials and tools. Here’s a list of what you’ll need:
Materials:
A wig base (we’ll discuss this in more detail in the next section)
Human or synthetic hair extensions
A wig stand or foam head
Wig clips or combs
T-pins or sewing pins
Wig cap or mesh cap
Thread and a sewing needle
Scissors (preferably hairdressing shears)
Styling tools (curling iron, flat iron, etc.)
Wig adhesive (optional)
Hair dye (optional)
3. Choosing the right wig base.
The wig base serves as the foundation for your pixie cut wig. There are different types of wig bases available, and your choice will depend on your comfort level and the final look you want to achieve. Here are a few common options:
360 wig base: This type of wig base covers your entire head and is the most versatile option. You can choose a 360 wig base that is either made of lace or mesh.
Lace front wig base: Lace front wigs provide a more natural hairline and are great for creating a realistic pixie cut wig. The lace at the front allows you to part your wig anywhere you like.
Mesh cap: Mesh caps are cost-effective and breathable. They are a good choice for lightweight and comfortable pixie cut wigs.
DIY cap: For those who prefer a more hands-on approach, you can create your wig cap using stretchy fabric and a pattern designed for wig-making.
Select a wig base that suits your preferences and project goals. If you’re new to making wigs, a full wig base or a lace front wig base is recommended for a more straightforward process.
4. Cutting and styling the wig.
Once you’ve chosen your wig base, it’s time to cut and style the wig to achieve the classic pixie cut look. Here’s how to do it:
Place the wig base on a wig stand or foam head. This will make it easier to work on and style.
Gather your hair extensions. These can be either human or synthetic hair, depending on your preference and budget.
Decide on the desired length of your pixie cut. The typical pixie cut is short, with hair barely covering the ears and a slightly longer fringe in the front. Use a comb and scissors to cut the hair to the desired length.
Begin cutting the hair in small sections, working your way around the wig base. Make sure to maintain an even length throughout.
Trim the front sections slightly longer to create a fashionable fringe. You can angle the scissors for a textured look.
Use a comb to blend the hair and create a seamless transition between the different sections.
Pay close attention to the back of the wig, as this area is often challenging to style. Use a mirror to ensure you achieve an even and balanced look.
If you want to add layers for extra texture, cut the hair in different lengths while being mindful of the overall shape of the pixie cut.
Check the wig from all angles to make any necessary adjustments and ensure a balanced, stylish pixie cut.
5. Adding texture and volume.
To enhance the texture and volume of your pixie cut wig, you can follow these additional steps:
Use a curling iron or flat iron to create soft waves or curls. This can add more dimension to your pixie cut.
Apply a texturizing product or hair spray to create a tousled, edgy look. You can use your fingers to style the hair in a messy, carefree manner.
Experiment with different styling techniques to achieve the level of texture and volume that suits your personal style.
6. Coloring and customizing.
If you want to customize the color of your pixie cut wig, you can dye the hair extensions to achieve your desired look. Here’s how to do it:
Prepare the hair dye according to the manufacturer’s instructions. Be sure to wear gloves and work in a well-ventilated area.
Test a small section of the hair with the dye to ensure you’re satisfied with the color. Adjust the dye mixture if necessary.
Apply the dye to the hair extensions evenly, starting from the roots and working your way to the tips. Use a brush or comb to distribute the dye.
Leave the dye on for the recommended time, and then rinse it out thoroughly.
Condition the hair extensions to keep them soft and manageable.
Customizing your pixie cut wig with a unique color can give it a more personal touch and make it stand out.
7. Final touches and maintenance.
After you’ve created your pixie cut wig, there are a few final touches and maintenance tips to consider:
Attach wig clips or combs to the inside of the wig base. This will help secure the wig on your head.
Use T-pins or sewing pins to adjust the fit of the wig cap to your head size. This step is essential for comfort and stability.
Style the wig on your head to ensure it fits properly and looks just the way you want it to.
To maintain your pixie cut wig, store it on a wig stand when not in use to maintain its shape and prevent tangling.
Regularly comb or brush the wig to keep it looking neat and free from knots.
You can wash your wig using a mild shampoo and conditioner when needed. Follow the care instructions provided with your wig base or hair extensions.
If you used a lace front wig base, be extra careful with the lace when styling and maintaining the wig. Avoid excessive tugging or stretching, as lace is delicate.
Consider using wig adhesive or tape for added security, especially if you plan to wear the wig for extended periods or during physical activities.
8. Last but not the least.
Creating a pixie cut wig is a rewarding and creative project that allows you to experiment with different styles and colors. By following the steps outlined in this guide and choosing the right materials, you can design a pixie cut wig that suits your unique personality and preferences. With a bit of practice and patience, you can enjoy the flexibility and versatility of changing your look whenever you desire. So, whether you’re looking to try out a bold new hairstyle or need a wig for a special event, making your own pixie cut wig is a fun and cost-effective way to achieve the perfect look.


 No products in the cart.